NOTE - This is probably the last "real time" post you will see from me for a couple of weeks as I am going on holiday. I have quite a few posts scheduled to appear while I'm away (if Blogger behaves itself) but I'll probably not have much chance to visit or comment on any blogs while I'm away, it rather depends on how good the hotel's wifi is. I'm just hoping I'll be well enough to make the journey - I've spent the last couple of days having a sorting-out blitz and seem to have put my back out, and today I can hardly move.
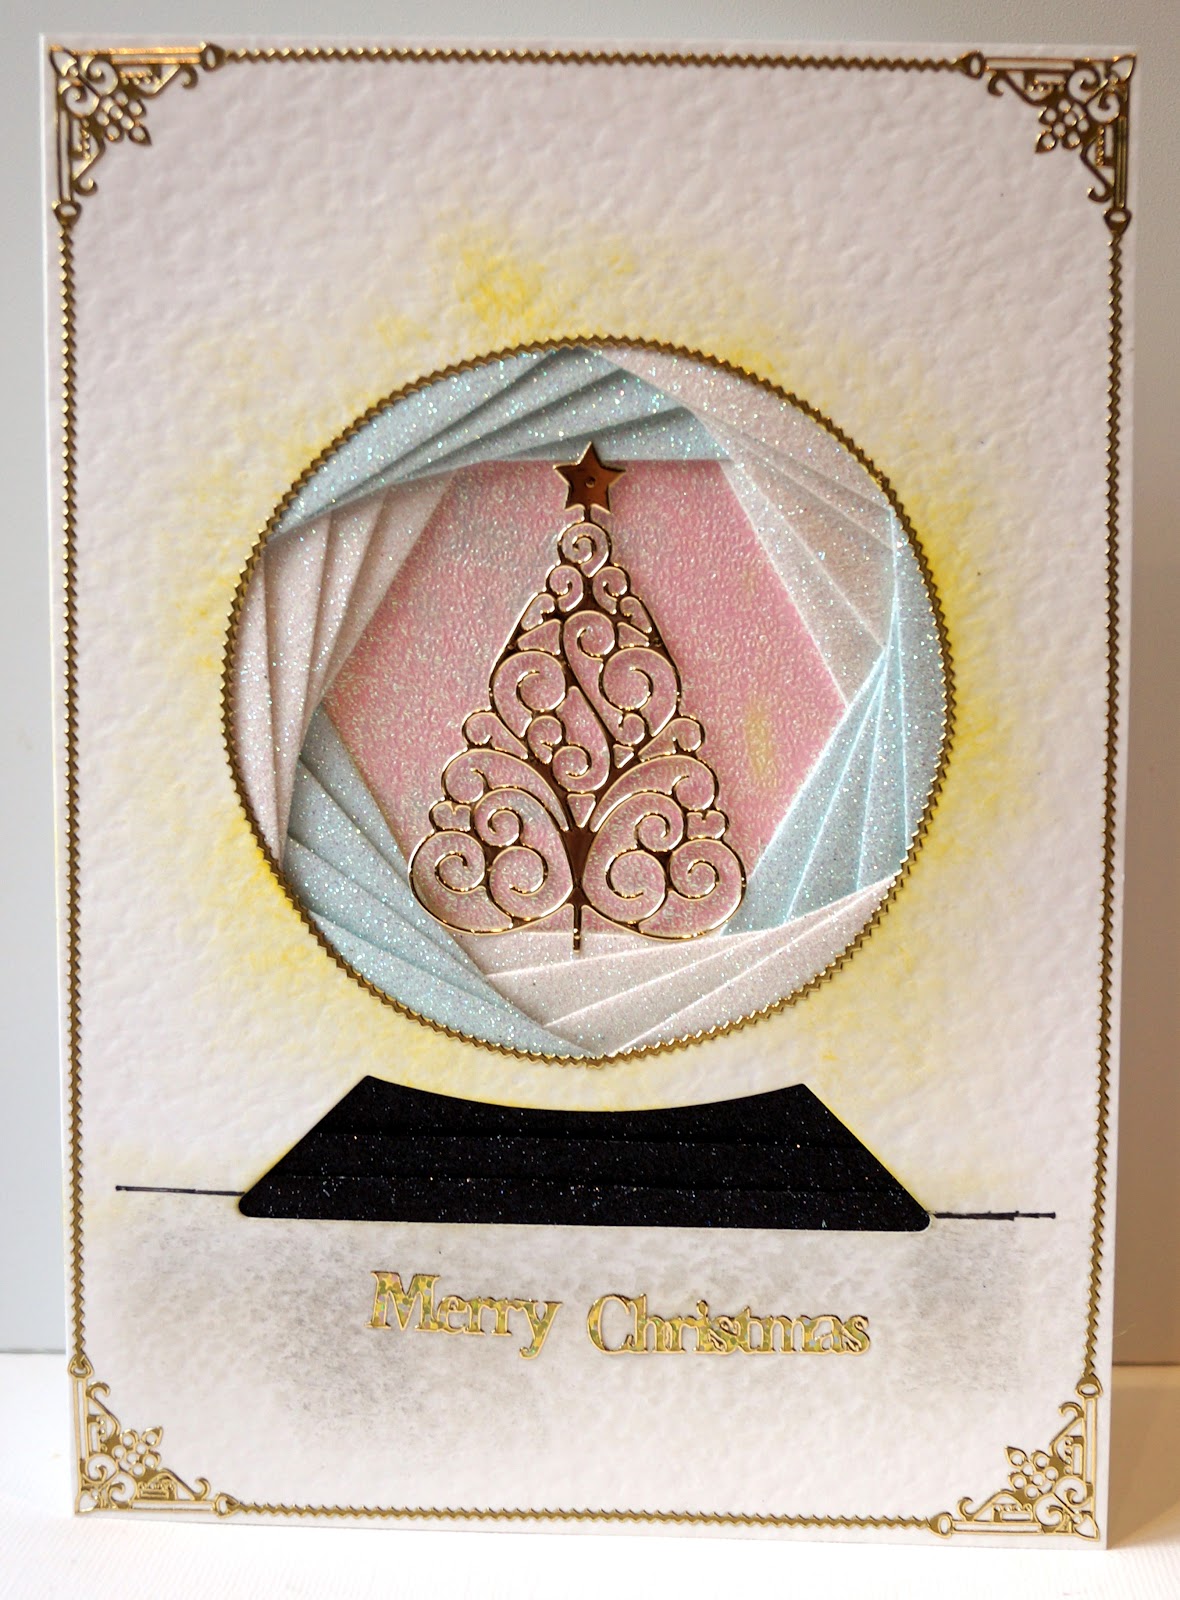
Many years ago I had a little dabble in Iris Folding. And by a little dabble, I mean I spent a small fortune on card blanks and pre-cut paper strips and then made two cards..... While looking for something else the other day, I stumbled across all the Stuff and decided to give it a second chance, and this snow globe blank seemed to be a good place to start since, just in case you hadn't noticed,
Christmas Day is exactly one month away!
The reason I'd lost interest after my first couple of cards when I'd tried it before was that the area around the edge of the aperture always seemed, well, rather dull. The folding and colours inside meant there was too much going on for it to be a CAS card, and yet it somehow always ended up looking unfinished. So I decided to add a bit of inking to add interest. First I gently inked with yellow around the globe part, to make it look as if it was sort of illuminated, and then (and this is the part I regret now) I added a horizontal line to represent a table surface and a little grey ink around and below the base to represent a table for the globe to stand on.
It looked fine at the time - I didn't realise then that once the card was finished, it would just look rather grubby, as if I'd been trying to erase a too-heavy pencil mark with a cheap rubber!
I used strips of very sparkly glitter paper for the folding. The instructions only give a border for the globe, suggesting the centre should be filled with a photo, but I filled the centre with pearlised paper and then added a die cut Christmas tree. I think next time I use one of these blanks I will try continuing the iris folding right to the centre, although I'm worried it might make the card too bulky.
The gold borders and greeting are there to try to distract you from that grey ink!
I'm sharing this with
Rudolph Day at Scrappymo's
Make my Monday -
Oh Christmas Tree
Christmas Card Challenges -
Anything Goes
Clear It Out Challenge -
Holiday/Glitter