Pages

Friday, 31 January 2020

Get well soon

When I saw that the latest theme at CAS on Friday was "Get Well", I simply HAD to get out the fun stamp set from Art Impressions even though several members of the CAS on Friday DT had already used it. So the challenge was to come up with something that wasn't a copy of a DT card yet still keep it CAS.


I decided to have the "nasty nurse" just appearing around the corner of the corridor - enough to strike fear into the heart of any patient! I used promarkers for the colouring.

I am sharing this with

CAS on Friday -  Get Well  

Addicted to Stamps and More - CAS 

Rediscovering an old pad

I always start the year determined to use up a significant amount of old stash, and while rummaging through it I found a beautiful K&Co pad that I bought on a trip to America about 15 years ago.

It's almost used up, and naturally all the snippets from the pages I've cut into are tucked into the pad. Among them was this tiny scrap of beautifully foiled paper that wasn't really big enough for anything except die cutting - which would lose some of that lovely pattern - or using behind an aperture, which is what I've done here.


I die cut the aperture from a scrap green card then embossed it with a thistle-seed embossing folder, then placed the paper behind it, mounted everything on gold mirri and finished all the edges with peel-offs (also ancient stash).  Then I added the die cut flowers and finally the butterfly which I raised from the surface with Pinflair glue.

I am sharing this with

Pixie's Snippets Playground  everything except the mirri is made from snippets

The Butterfly Challenge - Riffle green (and Rajah) and Raised Up

Thursday, 30 January 2020

Wine with friends

I've recently developed an addiction to Art Impressions stamps and here's a card I made using a fun image along with a Clearly Besotted sentiment.


I coloured it with Promarkers and added some ribbon to "frame"  it. 

I am sharing this with Use Your Stuff - Friendship 

Tuesday, 28 January 2020

Sparkly crystal

Rummaging around in my old stash is certainly unearthing some treasures! This time I found a barely-used pack of heat embossable acetate and some sparkly washi tape that I thought I'd used up.


I used an anti static pad on the acetate then stamped the gem in black and heat embossed it with clear powder. Then I coloured it on the back with an alcohol marker and left it to dry - alcohol markers take a lot longer to dry on non absorbent surfaces than on card and paper.

Meanwhile I added a couple of strips of sparkly washi tape to the card and stamped the sentiment.

I decided the best way to attach the gem without the adhesive showing through was to use spray adhesive. I'd completely forgotten that, being solvent based, the adhesive would affect the marker i'd used. At first I thought I'd ruined it - then turned it over and got a surprise. The effect of the pooling ink is lovely, a subtly distressed look that makes the gem look as if it is twinkling. I could have tried for hours to achieve something like that and never got close!

I think I may have to start experimenting with alcohol markers, acetate and spray adhesive!

I am sharing this with

Alphabet Challenge - Use Washi Tape

CASology - Crystal 


Inkspirational - Glitz a Strip 

Bears at Cardz 4 Guyz

It's new challenge day at Cardz 4 Guyz and today our theme is bears - real bears or teddy bears, take your pick!


I stamped this little cutie - he came free with Making Cards a few years ago - and coloured him with Promarkers and paper piecing. The papers I have used all come from the Dovecraft heritage Press collection.

Monday, 27 January 2020

The one that went wrong

If you've read my previous post you will know that I tried the Embossed Impressions technique for 52 Christmas Card Throwdown. However I have to confess that the snowflake I used wasn't my first attempt. The first one used an Enchanted Gold embossing powder that I've never really got on with and turned out to be a complete mess.

However as i went to throw it in the bin I spotted the back and noticed what a lovely clear impression the die had made. That just HAD to  be useful, didn't it? The surrounding card was messy with the flakes from the embossing powder, so I fussy cut around the image.


I filled the grooves inside the lines with Stickles glue.  For the background, I sponged Versamark through a stencil onto the card and heat embossed with hologram powder. The sentiment is die cut then covered with Versamark then heat embossed with white pearls powder.

The amount of sparkle, shimmer and shine on the finished card really has to be seen in real life to be properly appreciated!

I am sharing this with

The Male Room - it's snowing


Christmas Crafts all Year Round  - anything Christmas or Holiday goes

Fezziwigs Festive Frolics - White Christmas

It's still Rudolph Day

Rudolph Day is a very strange day indeed, because it starts on the 25th of the month and lasts all the way to the end of that month. So although today isn't the 25th, it's still Rudolph Day.


I used the "Embossed Impressions" technique which is this week's challenge at 52 Christmas Card Throwdown  - I'm pleased to be able to use this die as it never releases the die cuts properly yet is too lovely a snowflake to throw away.  I used a blue tinsel powder for the embossing - despite using an anti static bag, the Versamark on the die  meant that it didn't just stick to the embossed lines, however as it's all still enclosed within the embossed area I think it gives it a naturally frosty look. The matting is blue mirri and I've added a stamped sentiment and a few pearls.

I am sharing this with

Rudolph Day at Scrappymo's 

Addicted to stamps and more - Holiday


Shopping Our Stash - Winter Blues

52 Christmas Card Throwdown - Embossed impressions


Crafty Hazelnut's Christmas Challenge 

Cardz 4 Galz - white and blue

Sunday, 26 January 2020

Black Butterfly


I don't know what brand these dies are, as I( was sent them by a magazine to test and the article hasn't been published yet, but the butterfly cuts beautifully and cleanly, however the large floral corners are a real pain to get out of the die, especially the waste, and the "pokey holes" in them are so tiny that none of the usual waste removal tricks and gadgets seem to work. So cutting the corners turned into a bit of a Herculean task.

However the satisfaction of creating the background with inks and a stencil more than made up for the frustration and I do think the black stands out well against it. 

I am sharing this with

Allsorts Challenge - take flight

Just us Girls - photo inspiration 

Saturday, 25 January 2020

Sisterhood of Snarky Stampers #152 - Anti-Valentine

Valentine's Day is  only a few weeks away and lots of other challenges are already gearing up for it, so over at the Sisterhood of Snarky Stampers we are doing exactly the opposite and looking for an ANTI-Valentine.


And for me that has to involve my  all-time favourite stamp, the Katzelkaft Grumpy Cat from their "Les Chats Russes" set. .


I've thrown loads of texture at the card, which was inspired by one I saw on Pinterest,  with some corrugated card, a heart-embossed panel, a doiley, twine and a sarcastically sweet wooden embellishment, then added a sentiment stamped with a So Suzy stamp and Grumpy Cat and his clouds of gloom coloured with Promarkers.

Since making this, I've learned that the Finnish word for sweetheart translates into English as "the one I hate less than everybody else" so maybe this is not so much an anti-Valentine card as a Finnish Valentine!

Now why not share your anti-Valentines with us, you could become our next Queen or Princess of Snark!

Talking of sharing, I'm sharing this with

Show us your pussycats - Furrything goes/Happy Mew Year

Fab 'n' Funky - Add a doiley

Stamping Sensations - Favourite Stamps 

For a classic

I love the stamp set that came with the last issue of Creative Stamping - some gorgeous art nouveau and Charles Rennie Mackintosh style designs, including some stamps that are perfect for masculine cards.


I used Kraft stamped with Versamark for the background. I stamped the image, sentiment and frame onto watercolour card using Walnut Stain distress ink then used a watercolour brush to draw the ink out from the stamped lines to colour my chosen areas.  The matting layers are chocolate brown, although they look black in the photo.

I am sharing this with

Watercooler Wednesday - anything goes with a masculine twist 


Creative Crafting Uncles (their very first challenge!) - Cars 

Friday, 24 January 2020

Shrink plastic revisited

It's absolutely AGES since I had a play with shrink plastic and while tidying up my crafts stash I realised I had a couple of sheets of printable shrink plastic which I'd bought *cough* a little while ago.  They came with a free download of some tags to print and the date on the download is 2007 so the while might not be so little after all. And the pack was still unopened - talk about NBUS!

So, I printed the sheet of tags, cut them out and punched  holes in them and shrank them in the oven  since there were so many, and I now have a batch of handy little chunky tags to use. Here is the first of them in action:


This flower stamp is even older than the shrink plastic, it must be at least 20 years old. It's an un-named red rubber UM that came in a grab  bag and is one of my all time favourite stamps. I used Promarkers to colour it to go with papers from the Craft Asylum "Candy" range - also very old, these are among the final odds and ends from an old pad. In real life the pink of the tag, flowers and papers is a much better match than it looks here - blame the gloomy weather and the fact that plastic and paper don't reflect flash the same way!

I am sharing this with

Passion  for Promarkers - Include a Tag 

Stamping Sensations - Favourite Stamps 

Crafty Calendar - Add a tag (thanks for the heads up, Liz!)

Tuesday, 21 January 2020

Make a Wish


A one layer card today,  made using Uniko's Organic Wishes stamp set. I masked the card to leave a strip and blended inks in several shades of red and purple into it. Then I stamped the plants and sentiments overlapping onto the rest of the card, and finished with a few specks of white gel pen to represent seed heads flying into the distance.

I am sharing this with

AAA Cards - One layer (I've not included the twist)


Less is More - One layer, off centre 


Perfectly CAS - One layer 


Uniko - Anything goes (I've not used the twist - but I have used Uniko stamps)

Sunday, 19 January 2020

A quarto fold card

I didn't know this style of card had a name until I saw the current Butterfly Challenge!


I really wanted to use double sided card for this, but the design I wanted to use only came as single sided. If I'd glued two sheets back to back there would have been nasty bulges that formed around the creases,  so instead I followed the instructions over at the Butterfly Challenge to create my card in  the blue paper, adjusting the measurements to use a 12" piece of paper which makes a 4" square card. Then I cut the other paper to fit all the panels leaving a tiny white space each side of the crease lines so that the card would fold.

I stamped and die cut the sentiment then decorated the outside with die-cut butterflies, finishing each with tiny pearls.

I am sharing this with :

The Butterfly Challenge  - Quarto fold  and Quinacridone  (how I wish I'd known that word in my Scrabble playing days! - ACRID on the table and QUINONE in my hand would have led to a massive score!)

Allsorts Challenge - More than one word sentiment

Crafty Cardmakers - Anything Goes

Anything Goes at CD Sunday Plus

Our new challenge s just starting at CD Sunday Plus and as usual, it's Anything Goes as long as you include something from a craft CD, download or USB.

I've used the CD "The best of La Pashe 2012" (*gulp* - that means it's 8 years old now - and still one of my favourite CDs)


There are just a couple of layers of decoupage to add depth to the saucy scene, and I've added lots of other "romantic" embellishments including those 3 foam "x"s which could represent kisses - or just might suggest the scene is about to get a whole lot saucier!

I am sharing this with The Library Challenge - Romeo and Juliet  (although my Romeo and Juliet are rather older than those in the play!)

Friday, 17 January 2020

Masculine 18th birthday card

It's the 18th birthday of a friend's son and I wanted to send him a card. Normally I would make a teenage boy's birthday card themed around one of their hobbies, but this young man has just been injured and had to give up his beloved rugby so I didn't think a rugby themed card would be very tactful.

So I decided to go for a CAS style, using the colours of his favourite football team which are red, navy and white.


I used snippets of navy and red card, die cut to make the topper, with the square navy card embossed with  a Tim Holtz embossing folder. The stamped sentiment is matted with the rest of the red and navy card. 

I used the computer to print a sentiment for the insert


I am sharing this with

Pixie's Snippets Playground - challenge 369  

The Male Room - Anything Goes

Wednesday, 15 January 2020

Layered stamping - my first attempt

Last month one of the craft magazines ran a daily competition on Facebook with lots of prizes and I was one of the lucky ones, winning this lovely layering stamp set from Altenew. The trouble was I didn't have enough inks in shades of any one colour to try the layering. Then I took part in a video survey for a craft business and was given some vouchers to thank me for it - enough to buy two  Altenew packs of coordinating mini ink cubes, so over the last rainy few days I've been having a play.


I'm not used to lining up the different layers yet, as you can see - I think maybe some guidelines on the stamps would help a lot, maybe I'll try adding some with an indelible pen. I have another set of layering stamps lurking in my NBUS where it's been loitering for several years - I wonder if I'm brave enough to give that one a try now?

For the base card I used a Marianne large scalloped circle die to cut a card blank, making sure the die was positioned so that the card would rest on two scallops symmetrically at the bottom  and that it overlapped the fold to leave it hinged at the top, then cut the circle again in deep ruby card and aligned it over the base card. Then used my old faithful Nesties to cut out the image and a light ruby scalloped layer.

I am sharing this with

Allsorts challenge - Flowers

Make My Monday - anything but square 

The Flower Challenge - Shaped Cards  

Tuesday, 14 January 2020

Clean and Simple at Cardz 4 Guyz

It's our first challenge of the year at Cardz 4 Guyz and today we'd like to see your masculine take on a Clean and Simple card.


I've used an old set of dinosaur stamps that I've had for  6 or 7 years now - I think they were from Clearly Besotted but it could have been Woodware - and LOTS of masking. The sky is blended distress inks and everything else is coloured with Promarkers.

I am sharing this with

Passion for Promarkers - Animals

Inkspirational - Fauna 

The Male Room - Anything Masculine Goes 


Use Your Stuff - Anything goes

Monday, 13 January 2020

Coral and Blue


The current challenge at Less is More is "Living Coral and True Blue" using the 2019 and 2020 Pantone colours of the year. The butterfly was die cut in white and coloured with Promarkers to give a deeper tone towards the body, getting paler out towards the wing tips. It is mounted on a die cut stitched square of blue card.  The gloomy winter daylight means I had to use flash to take the photo, so the coral has come out looking lighter and the dark blue card darker - it is actually almost exactly the same shade of blue as the stamped sentiment below it!

Saturday, 11 January 2020

A winter walk

Although this isn't a Christmas card, all the stamps except the sentiment came from a Christmas set that came with a recent issue of Creative Stamping magazine.
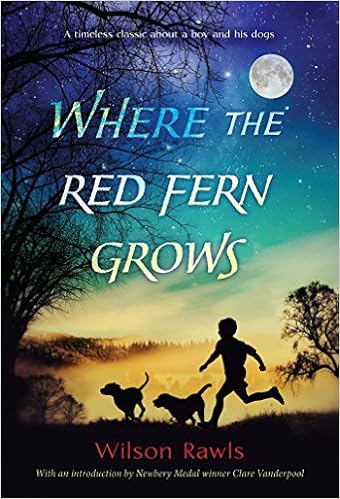

I made the background by blending distress inks with a mask in place for the sun/moon  then stamped all the silhouettes and sketched in the distant horizons. The post-Christmas period often means we need to send Thank You cards so this winter scene is very suitable for the occasion.

I am sharing this with

Sweet Stampin - attitude of gratitude 

The Library Challenge - Where the Red Fern Grows   - inspired by the cover

Sisterhood of Snarky Stampers challenge #151 - H is for Headache

Our latest challenge at the Sisterhood of Snarky Stampers is H is for headache.


I hope you've all recovered from your post-festive-season headaches now, and that the clashing colours of my card don't give you a new one!


I stamped the woman - a VLV stamp - then masked her and the edges of the card and sponged and stencilled the background over the whole thing. The sentiment is a Tim Holtz sticker.

Friday, 10 January 2020

Guest designer at Twofers

I'm over the moon to have been invited to be a guest Designer at the Twofer Card Challenge where this month the theme is Hearts.


If you are not familiar with  this challenge, the task is to use one stamp, die or stencil to create two cards for two different occasions and using two different layouts. I've used a Sizzix heart die for my two cards: 


My first card is for Valentine's day. I've made a border across the card with the die cut three times, using 3D adhesive to raise the central one above the other two. 


I am sharing this card with Country View Challenges - Love 

***

For my second, I've treated the hearts as the leaf-lets of a four leafed clover or a shamrock, so this card would be great either as a good luck card or, if you celebrate St Patrick's Day, a card for that. 


I am sharing this with Fab'n'Funky - No Designer Paper 

I'm looking forward to seeing what you all create.  


Wednesday, 8 January 2020

To gnome you is to love you!

When I posted this card on Sunday,  I suggested that it wouldn't be long before the other stamp sets from the bundle saw ink, after sitting around as neglected NBUS for so long. Well, it turned out to be sooner than I expected for this little cutie:


All the stamps and dies came from the set (and I STILL can't remember the brand) and were coloured with Promarkers, and the grass is a strip of very handy grass-patterned washi tape.

I am sharing this with

Shopping Our Stash - Gnome Sweet Gnome 

A Place to Start - Anything Goes/Clean and simple 

Monday, 6 January 2020

Proud as a peacock

I'm usually pretty good about remembering what I have and not doubling up on stash, but I somehow managed to do that with peacock dies  and I've ended up with two similar in size and pose yet not quite identical. For this card I cut both then played around to see which worked best, so expect another peacock based make from me soon using the other one.


For the peacock (s) I painted splodges of blues, greens and purples onto watercolour card, letting the colours blend at the edges, then die cut the images once dry.

I used a kaleidacolor pad in matching colours to stencil the quarter-mandala onto the base card then stamped the sentiment over it - a very suitable sentiment for a peacock! - then attached the die cut with 3-D adhesive.

I am sharing this with

2 Crafty Critter Crazies - anything goes with a creature 

CAS watercolour - cool colours 


Sunday, 5 January 2020

Don't worry, bee happy

I've had this stamp and die set, and two others from the same series,  for about a year now but this is the first time I've used them. I'm afraid I don't remember the brand, there isn't space for packaging in my overcrowded storage system! The dies are pink, which makes me think Heartfelt Creations, and yet they are soooooo much not typical Heartfelt Creations style. And as they were a gift I can't even search out the invoice. Anyway, all three sets had never seen ink until today - and I've enjoyed making this so much I think the other two will be along soon. 


I used a stencil to make the background and coloured the images with Promarkers.

So, despite the stamps and dies being a year old, they were NBUS and I reckon that counts as new!  Hence I am sharing with

Alphabet Challenge - try something different

Sweet Stampin' - New Stash 

Little Red Wagon - use your NBUS

Tales from the Craft Room - something new