I've spent several hours of today scouring through my craft CDs, including a few I've not looked at for years. Why? Because the new challenge at CD Sundays is "Stepping out" and I wanted a shoe-themed image to use. But could I find one? I've been through hundreds of images, but all I could find was gardening boots and I seem to have used the garden theme a lot recently, so I was on the verge of giving up and deciding I wouldn't be able to play this week (I know I have no shoe-themed stamps or pre-printed toppers to use with other elements from a CD) when I came across this vintage style picture on a CD called Grandma's memories, which I think I won in an earlier challenge on CD Sundays.
The background card is a bit left over from an old Hunkydory kit, edges softened with a little Aged Mahogany distress ink. The woven card panel, with matching border, was part of a kit I bought in my early days of TV craft shopping - one of those kits that looked ever so useful when it was demoed, but soon became samey when I got it home. I think there were the materials for about 48 panels - over the years I've gradually worked my way through many of them but I still have about a dozen left. The trouble is that they are so bold and eye-catching that any image paired with one tends to look a bit overwhelmed, but I think using it behind quite a large image has diluted that effect a bit.
The matting, flower and swirls are cut from snippets, with the tips of the petals of the upper flower also lightly inked, so I'm popping this into the Snippets Playground as well.
Stamping is often seen by new crafters – and sometimes
experienced ones – as being very difficult, but in fact it’s a wonderfully easy
way to create the main focus of your card, add decoration or even create a
complete background. It’s just a case of using the right tools for the job and
knowing how to use them.
When you first go shopping for stamps you’ll see a glorious
array of designs in all shapes and sizes; words, pictures, collage designs,
abstract designs, borders and corners. It’s tempting to go for large picture
stamps at first – I know I did, and I have several rather expensive stamps that
never get used – they simply aren’t versatile enough. For your very first stamp
purchase, I’m going to suggest that you get the words “Happy Birthday” (or
“Merry Christmas” if you are thinking about making Christmas cards) in a fairly
simple font that will work with lots of different styles of card. Choose one
big enough to stand alone as a focal point but small enough to add to a card
that already has a main image – around 8cm by 5cm is useful.
Stamps come in several types. The traditional ones are made
of rubber and mounted on wood. If
you treat these carefully, they will last just about forever. But they can be expensive,
and if you buy a lot of them, can take up a lot of storage space. Much cheaper,
and in a fantastic range of designs, are the clear plastic ones. If you buy these, you need to buy clear acrylic blocks to stick them to
when you are using them. Simply peel them off the backing sheet and place them
on the block, where they will cling until you remove them. Clear stamps can
discolour when certain inks are used with them – this is nothing to worry
about, as it won’t affect the performance. But they don’t last like rubber ones
– I’ve found that older ones, especially ones that don’t get regular use, can
go rigid and crack. There are also unmounted red or grey rubber ones, intended
for you to mount yourself. I sometimes use these by sticking them to an acrylic
block with a glue stick, then cleaning off the glue immediately after use, but
it isn’t an ideal way to use them!
Next you will need an ink
pad. Again, you will be tempted by all the colours and types of ink
available. But many of those ink pads aren’t suitable for the straightforward
stamping you’ll be doing to start with. Make sure that whatever ink you buy
says the word DYE somewhere on the
packet – you often need to look at the BACK label to find out! This means that
it will dry quickly and cleanly on most surfaces. Pigment inks are for
embossing with (more on that later) and Distress inks are great for blending
and covering surfaces with – you CAN stamp with them, but they’re not ideal to
start with. Ignore all those lovely colours, glittery metallics and rainbow
pads – they all have their places, and you can add them to your collection
later on. To begin with, just buy a plain black one. With this, you can stamp
words for on cards, stamp images to colour in, stamp silhouettes and edge
papers to give them more definition. Most experienced stampers still use black
or dark brown ink more often than any other. For a very first inkpad purchase,
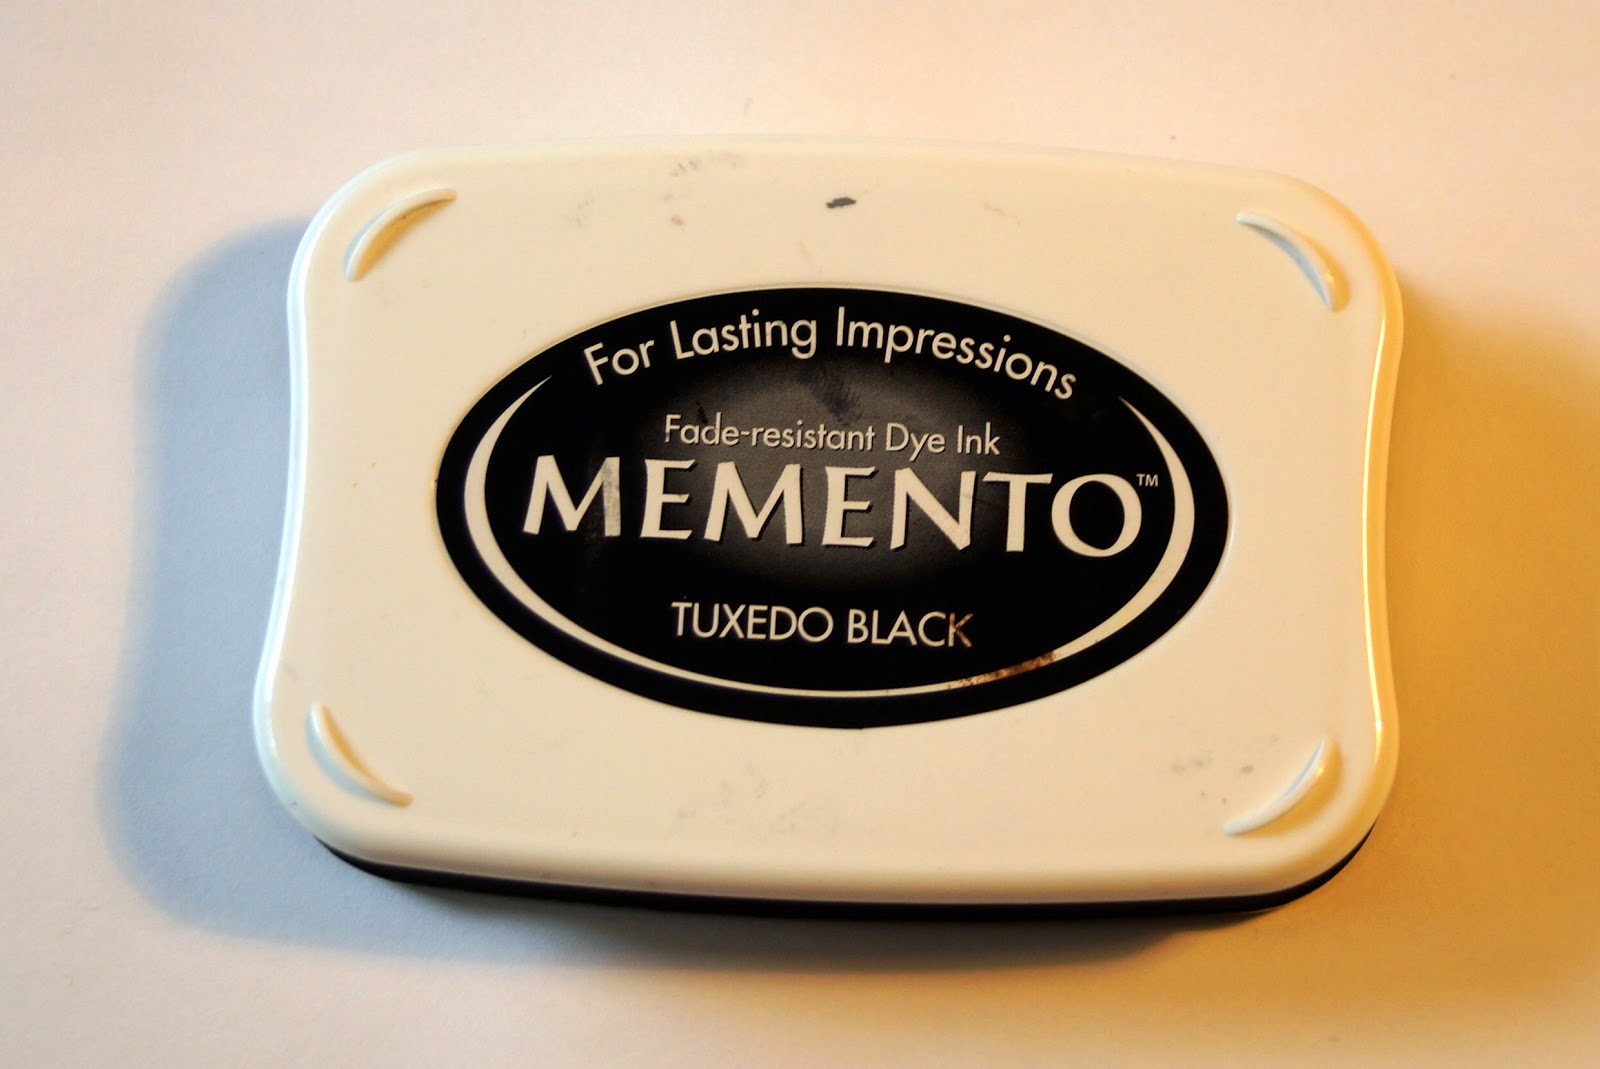
I suggest a Memento inkpad in Tuxedo
Black.
Then you need something
to stamp on. White card is the best to start with, although you can get
some great effects with other colours and with patterned papers. Choose a good,
smooth but not glossy card. A lot of the cheap card sold in pound and bargain
stores doesn’t have a smooth surface and will give your stamped edges a
slightly blurred effect, so it is worth spending a few pence more and buying
card sold by a craft company – if you don’t want to order online, you will find
it (in the UK) in stores like Hobbycraft and The Range, or if you are lucky
enough to have a local craft shop, ask the staff to recommend a good stamping
card.
Finally you need something
to clean up with – dirty stamps can get clogged with ink and that will
spoil the image. You can get specialist stamp cleaners, but to start with a
pack of unscented baby wipes (the kind sold for sensitive skins) is ideal, and
useful for lots of other messy-craft-cleaning jobs too.
Right, you’re home from the shops and raring to go. What
now?
First of all, prepare
your stamp. If it’s a wooden one, get a piece of sticky tape and quickly
and lightly press it to the surface of the stamp a few times to remove any
polish, preservative or, if you’ve bought it from a display, dirt and grease
from grubby fingers. A clear plastic one just needs to be removed from the pack
and stuck to an acrylic block. If you’ve bought a set of blocks, choose one
that the stamp fits comfortably on without having too much space around the
edges.
Now get your card
ready to stamp on. You’ll often find that you get a better image if it’s
not sitting on a very hard surface. I use a wodge of scrap paper from an old,
non-standard sized printer. It just has a tiny bit of give – and it also means
I can test stamps on it before I apply them to my card, stamp over the edges of
the card without making a mess of my craft mat, and generally not worry about
any mess I make as I can simply throw the top sheet away. And as we’ll see next
time, it’s great for when I’m heat embossing too.
At last it’s time to inkyour stamp – and if you’ve tried stamping
before and not had much success, this could be where you are going wrong. Do
NOT lay the inkpad on the table and press your stamp onto it. You’re not a
1950s librarian! Instead, lay the stamp
flat on the table and tap your inkpad gently and repeatedly over the surface
until it is evenly covered in ink. There are two reasons for this. The first is
that by doing it this way, it really doesn’t matter what size your stamp and
pad are – you can use the cute little 1” square pads just as easily on a huge
stamp as on a tiny one. The second is that you have far more control over how
much ink is applied to the stamp, so that it doesn’t get pressed into the
grooves and onto the wooden or acrylic surround. If you DO get any ink on the
surround, wipe it off quickly with a tissue.
And then, quickly before your ink starts to dry, turn your
stamp over and press it smartly and
cleanly straight down onto your card. Don’t tap it, and don’t lift it off
straight away, instead press down evenly over the back without wobbling or
rocking it at all. Then lift it smartly away, again without any sideways
movement, and you should see a good, sharp, clear image of your design.
Practice this until you are sure you know just how it feels to be holding the
stamp and pressing it down correctly. And when you’re satisfied that you’ve got
the knack, don’t forget to close the lid of your inkpad and clean your stamp.
Extra-grubby clear stamps can be washed under the tap, or in lukewarm soapy
water, and if you have old ones that don’t cling too well this can be a good
way of restoring the cling. But don’t get wood mounted stamps wet, or the wood
could warp. Inky wood won’t affect the performance of your stamp, although if
you ink up your stamps carefully this isn’t likely to happen.
If you’ve stamped an image, you may now want to colour it in. You can use pencils, wax
crayons, water colours, chalks or marker pens. Some marker pens are water based
and some alcohol based – the reason I suggestedMemento ink rather than any other is because, unlike some other inks, it
doesn’t smudge when alcohol ink comes into contact with it.However if you are using watercolours, or
water based markers, they CAN smudge, so you may prefer to save these until
you’ve started to create embossed images. I’ve found a very useful guide to
different inkpads and the best way to colour them on eBay of all places! http://www.ebay.co.uk/gds/GUIDE-TO-RUBBER-STAMPING-INK-PADS-PIGMENT-OR-DYE-/10000000005503021/g.html
I’m not a great expert on colouring techniques but if you
search You Tube or Google for “Colouring stamped images” you’ll find lots of
advice, information and inspiration.
Here’s a little video I have made of stamping an image, or you can view it on YouTube –
please forgive the quality, it’s the very first time I’ve recorded a video on
my DSLR so I was too worried about getting it right to actually SAY anything! Plus
I was holding and operating the camera in my right (which in my case is my
wrong) hand, while trying to stamp single handedly. If the video looks OK-ish
despite all that once I get it on to the blog, I’ll set up the tripod before I
make my next instalment, which will be about heat embossing, because I
definitely can’t do THAT one-handed!
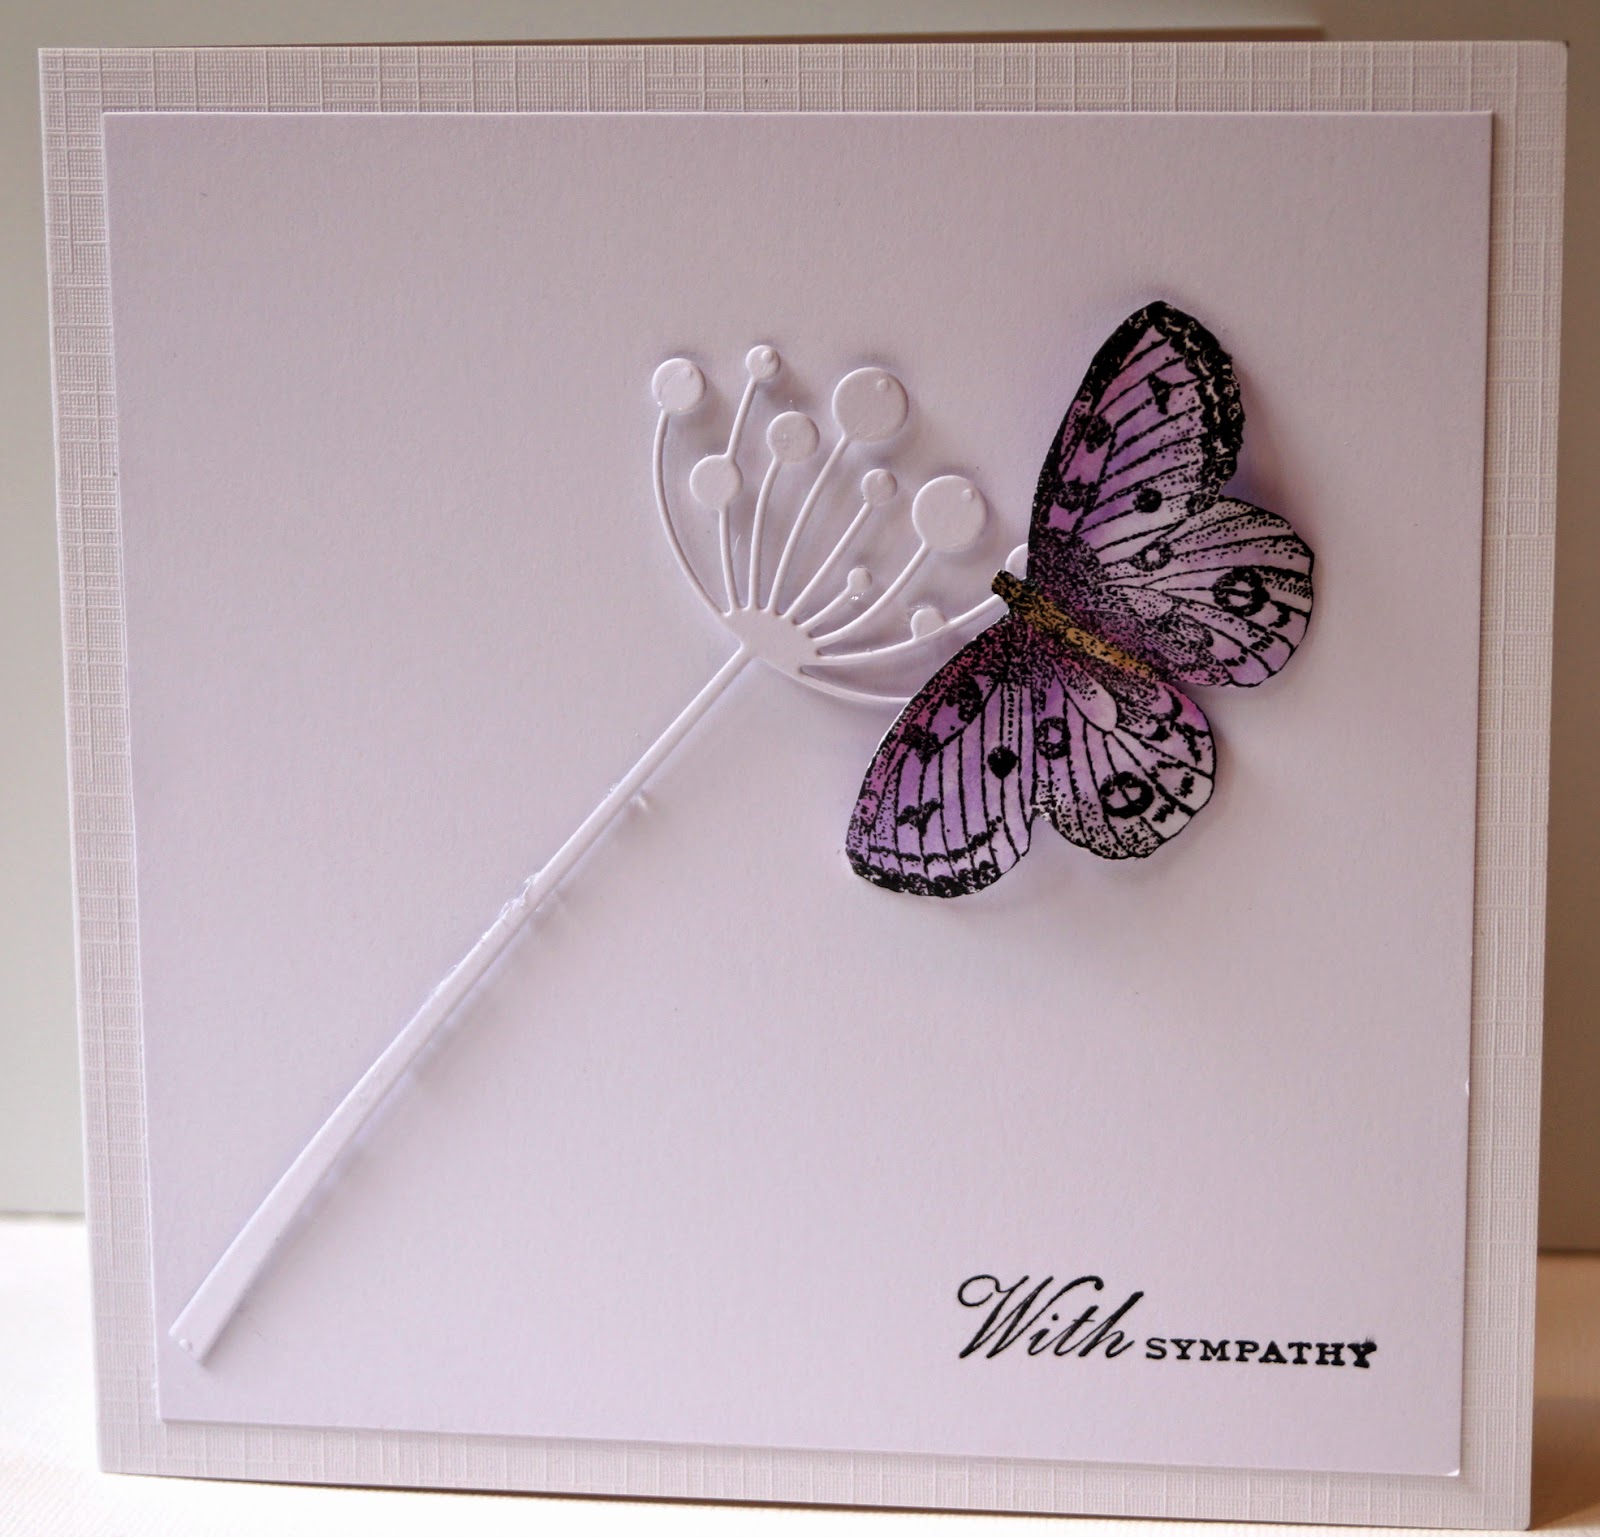
I think the Clean and Simple style is perfect for sympathy cards. Partly because CAS cards can be very peaceful and tranquil, which feels right for the occasion, and partly because they can be very quick to make. Sadly they are a type of card that we often need unexpectedly, and we can't keep the recipient waiting for days while we faff around with layers, techniques and embellishments!
I like to have a few ideas for sympathy cards in my mind, ready to produce as soon as they are needed, and today I thought I'd share some of them with you.
The first simply uses white on white layers and die cuts, finished with a butterfly, stamped with an Indigo Blu stamp and coloured with Promarkers in shades of purple, using a blender pen to fade the colour towards the lower edges of the wings. Butterflies have a very special place on sympathy cards for some people, as there is a superstition that a visit from one soon after a bereavement means the person you have lost is thinking of you.
The second has the fern image stamped then re-stamped to the side slightly without re-inking, to give a delicate shadow effect.
I have also posted simply sympathy cards a few times in the past, so for more inspiration look here and here.
I'm sharing today's first card with
Sweet Stampin' Challenge Blog - Clean and Simple
Addicted to Stamps and More - CAS
You may have noticed over the years that I'm very partial to eggs in, on and around curries of any kind. And whether the curry is an authentic Indian dish or what I call an "English" curry - and the Curried Eggs With Cauliflower that I made this week from Delia Smith's book "Frugal Food" is most definitely the latter; I've never seen an Indian curry recipe where the sauce is made using the roux method.
I've had a look around to see if Delia's recipe is on the web, but it isn't so I can't provide a link, and naturally copyright means I can't reproduce it here, but it's very simple. For two people I boiled 5 eggs and set them aside to cool. (Here's a tip - after cooking, crack the shells all over then place the eggs in a bowl of cold water to cool. When they are cold, they will be really easy to peel). When cold, I peeled and halved them.
Then I cut half a cauliflower into large florets and boiled them until only just cooked, then drained them over a jug and saved the liquid.
I fried an onion in oil and butter, adding garlic when it was almost cooked. Then blended in flour and some spices - I used ground coriander, chilli and turmeric, but you could use your own blend or a ready-mixed curry powder- cooked for a minute and gradually blended in enough of the cauliflower water to give a thick sauce. I mixed in some natural yoghurt and a spoonful of mango chutney, then added the eggs and cauliflower back to the pan and simmered very gently until the eggs and cauliflower were heated through.
With hindsight, I could have made this even more "English" by adding a handful of sultanas along with the egg and cauliflower. And maybe sprinkled some desiccated coconut over the top. Hell, I could even have served it with chips!
The image on this card is printed off from Joanna Sheen's "Viva La Divas" CD. Actually I printed it months ago and then couldn't decide what to do with it. So many of the designs on that CD aren't really very versatile - in fact I keep deciding to get rid of the CD, and yet despite it being hard to find a use for them, the images make me smile so it always gets a reprieve.
So when I saw that the challenge at OLLCB this time is to use a pre-coloured image, I decided to get this out and play around with it. And at the moment I know quite a few people who are very successfully losing weight, and realised it would make a great congratulations card for one of them when they reach their target. I've combined it with some patterned paper from my stash and a suitably food-themed tag, finished with some congratulations stickers.
No, not the game! But words from a rather useful little set of Studio G stamps. I was actually lifting out a printed tag for another project when I spotted this cute little guitar tag that I'd forgotten all about, and thought that it would work very well with words from this stamp set. I stamped the "rock on" word strip repeatedly (guided by masking tape) to create borders top and bottom, as well as the words Guitar and Hero, then brightened up the tag with a gold star brad and there you go, Bob's your uncle!
I'm sharing this with
CAS-ology - Music
Addicted to Stamps and More - CAS
Clear it Out Challenge - Green/Green things
Many years ago, my husband was an officer in the Brigade of Gurkhas. While he was serving, one of my friends was a lovely lady called Sita Gurung. We've not been in touch with each other since our husbands both left the Army, 30 years ago, and over the last few weeks I've been thinking about her, and wondering whether they moved back to Nepal and if so, whether they are safe after the terrible earthquakes that have struck the country.
Sita is the lady who gave me one of the most treasured recipes in my collection - Aludam or spicy potatoes (not to be confused with the Indian dish, Aloo Dum, which has a very different flavour and texture). It used to be served every time there was a function in the Officers' Mess, either as a nibble on cocktail sticks or as a side dish to a curry or barbecue. And I have to confess, that when I was expecting my second baby, I developed such a craving for it that I would sometimes drive to the camp and beg for a plateful at the door of the cookhouse!
There are lots of versions of the recipe, and somewhere I have a copy of the one used in the cookhouse, but I tend not to make things in batches of 350 servings at a time, so I prefer to use Sita's version from her own hand written recipe. She gave it to me 30 years ago and I have used it, and passed it on to friends, many, many times since.
It's getting rather hard to read, and the numbers on it aren't quantities, they are just a good old military style numbered list of items! There are no exact quantities, she explained, you just use what you have to hand and what you feel like using at the time. You can vary the amount of spices and the proportions of the various vegetables and potatoes, and change between tinned, fresh and purée for the tomatoes, so you never get exactly the same dish twice.
To take the eyestrain and guesswork out of it for you, here is a recipe with quantities that work for me.
500g cold boiled potatoes
½ teaspoon fenugreek seeds
2cm x 3cm piece fresh ginger, grated
2 cloves garlic, crushed
2 medium onions, finely chopped
2 tablespoons tomato purée OR 200g tinned chopped tomatoes OR 3 fresh tomatoes, chopped (I used fresh tomatoes in the dish I photographed)
1 teaspoon turmeric powder
¼ teaspoon chilli powder
2 tablespoons vegetable oil or ghee
salt to taste
fresh coriander to garnish (I omit that as my husband is allergic to it)
Cut the potatoes into chunks about 2cm across.
Heat the oil in a large frying pan and fry the fenugreek seeds for a few seconds, then add the onions and cook until soft and light brown. Add ginger and garlic, stir well and cook for 2-3 minutes. Stir in the spices, then add the tomatoes or purée and mix well. If using fresh tomatoes, cook for a couple of minutes until they soften. When everything has cooked to a pulp, stir in the potatoes and cook very gently until heated through. Sprinkle with coriander and serve.
If you've enjoyed reading this recipe, I would love it if you considered making a donation to the Gurkha Welfare Trust's Nepal Earthquake Appeal. You can find out more about the Trust on their website and read about their work in response to the earthquake, as well as finding out how to donate, here. There are lots of ways to donate - you can even do it by sending a simple text message.
Note - if the "Print" button above doesn't work, use the "PDF" button which is more reliable and allows you to save it to your device.
I'm submitting this to Recipe Clippings - your "most used" or "most shared" at Farmersgirl Kitchen.