Saturday, 7 November 2015

Things With Wings at Twofers

It's time for our new challenge at Twofers, and this time we would like to see your makes showing Things With Wings  - and remember we want to see some stamping on your work, and no digis. There is a prize of a $20 Alleystamps voucher for our favourite!

Our wonderful sponsor

As you know, I love dragonflies so that was my obvious choice for this fortnight's challenge. And thanks to this super video posted to You Tube by the gorgeous Craftynotshifty (if you're not following her all over social media, you're missing out!) I was inspired to come back to a technique I haven't used for years - embossed resist. (Now you may be thinking, hang on, she used it only a few days ago - but actually I'd already made this card and scheduled the post before I used it on the snowflake card..... since trying it again I've got hooked!)

I watercoloured the background first, then stamped and embossed the dragonfly and sentiment using Versamark ink and clear powder, then rubbed Onyx Black Versafine ink all over, wiping the stamped images with a tissue to remove any ink clinging to it.

The background paper was from an old magazine freebie pad.


I am sharing this with

Butterfly Challenge - Z is for Zigzags  because of all those  zigzag stripes in the backing paper
and my dragonfly is playing at being a butterfly because Mrs A says that's OK
Just us Girls -  word week Stripes again because of the backing paper

Wednesday, 4 November 2015

The card that went wrong

It's ages since I shared one of my "cards that went wrong" because usually I find a way to rescue or recycle the failed attempt, but this one was beyond redemption, so I'm sharing it as well as the replacement card which, although it didn't go exactly according to plan, worked much better.

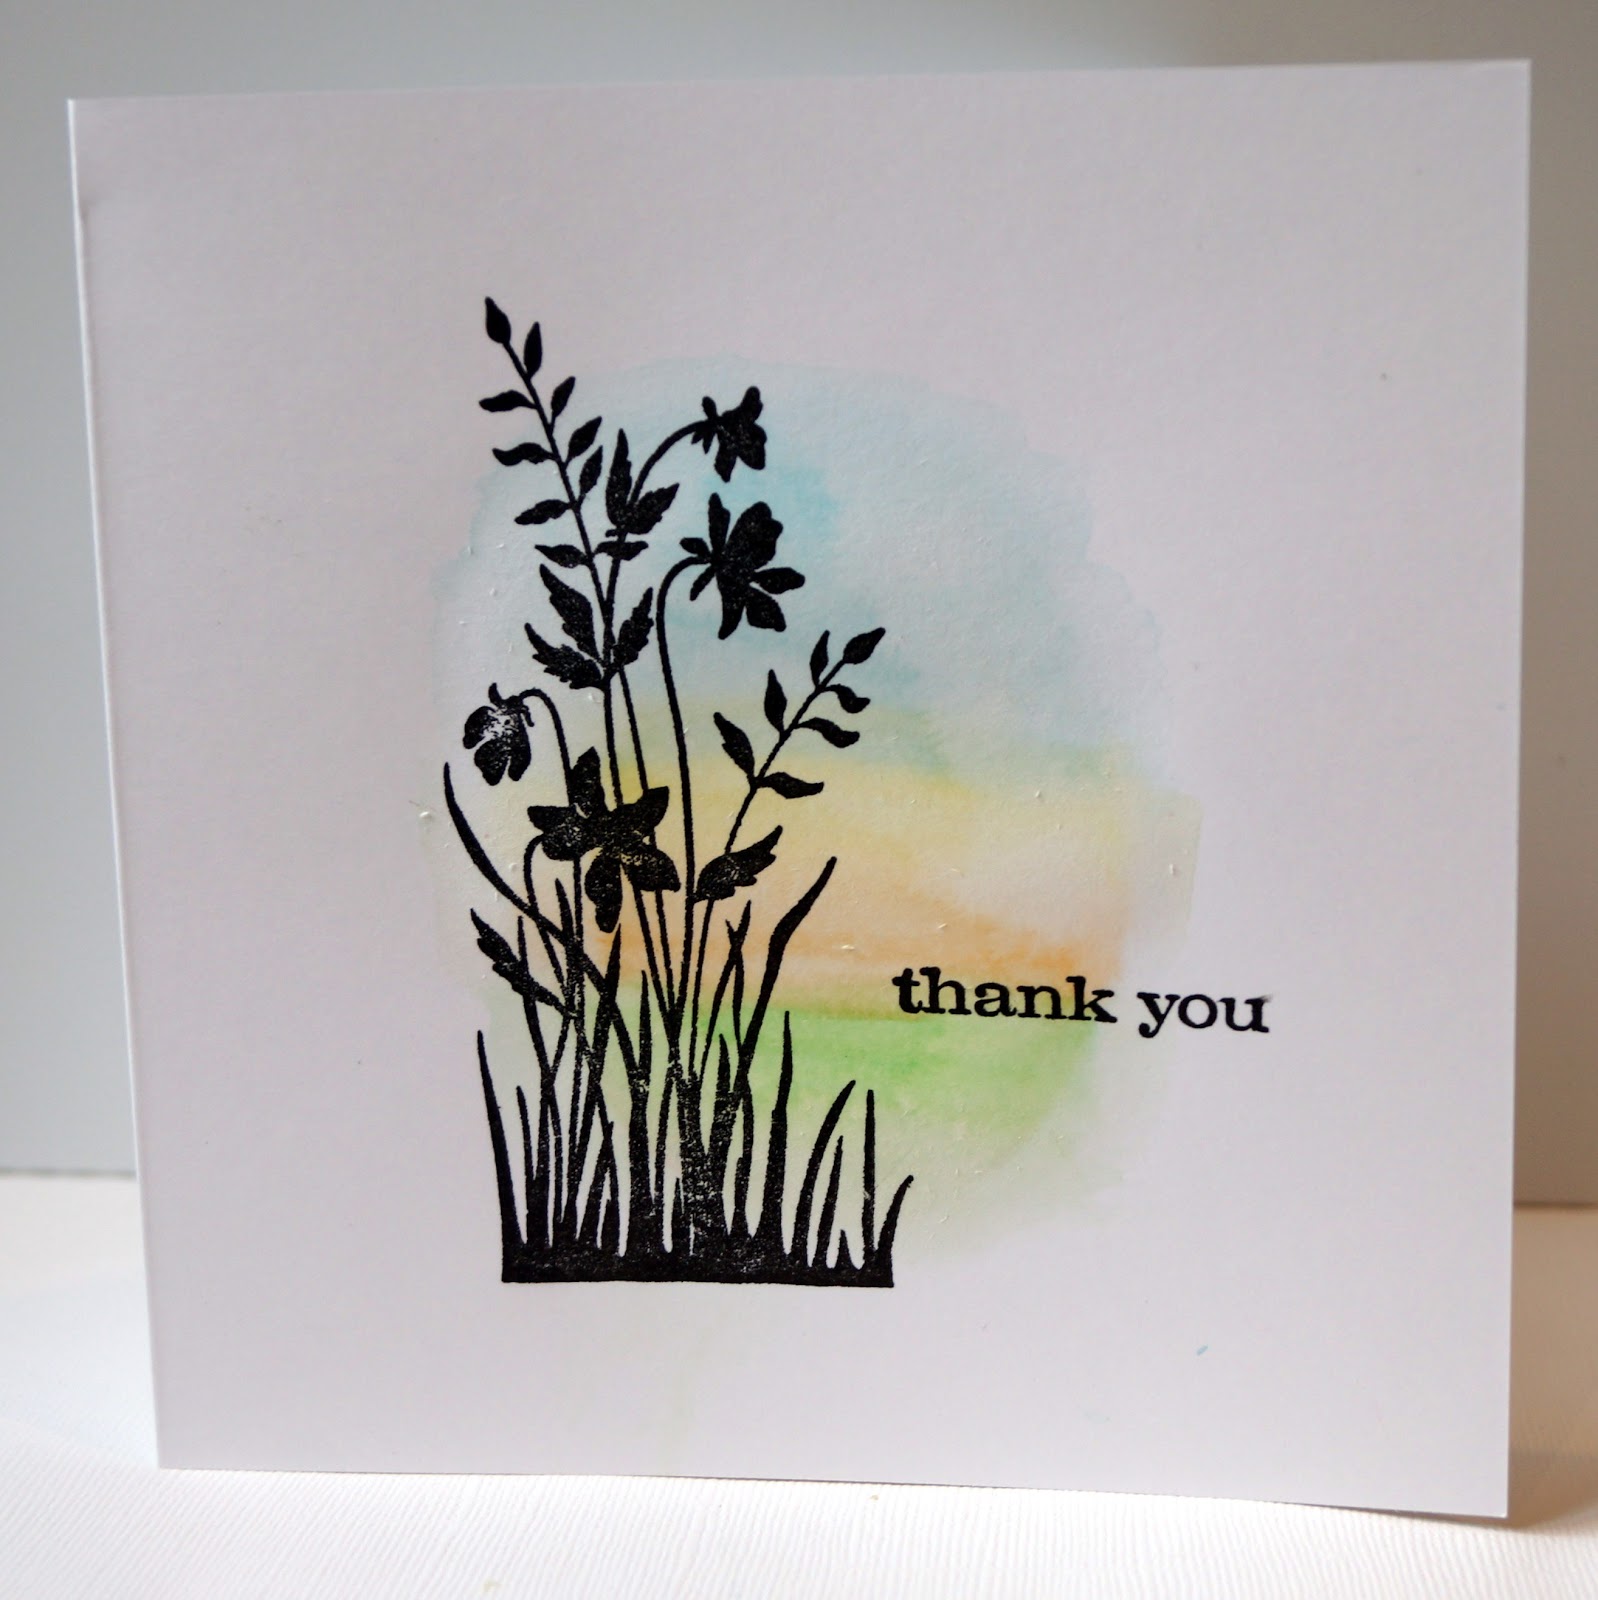
I'd seen a beautiful CAS card on Pinterest that had been made by watercolouring through an aperture, leaving it to dry and then overstamping in black. I decided to try to recreate the effect, using a circular aperture.

As I don't have any watercolour paints, I scribbled water based markers onto scrap acetate and then picked up the ink with a water brush and painted bands of colour through an oval mask onto my card.

However when I removed the mask, some of the ink had oozed under the edge of the card, making the edges messy. I thought that maybe I could rescue it by using the watercolour brush again to tease out the ink at the edges, removing the definition of the oval and making it just fade away. But by now the card was over-wet and started to pill and crumble on the surface.

Nevertheless I left it to dry and overstamped it, but the pilled and rather buckled surface wasn't good for stamping on and the image came out faint and patchy.

Here is the finished card, which actually looks much better in the photo than it does in real life.


Seeing that the idea had potential, I went back to the drawing board and this  time created the background shape by scribbling the markers onto an acrylic block and spritzing it with water before using it like a stamp. This was MUCH more successful, although it gave me much bolder, brighter bands of colour than I had been setting out to achieve. I like the way the spritzing has created interesting blending patterns between some of the bands of colour.

Because the card wasn't over-wet this time, the surface stayed undamaged and accepted the stamping much better.


So there you are - I may not have rescued my original card, but I DID rescue the idea, even though it wasn't what I'd originally intended to do.

I'm sharing my new, improved card with:

Addicted to Stamps and More - Clean and Simple
One Layer Simplicity - a Multitude of Gratitude
Mod Squad Challenge - Give Thanks  
Just Us Girls - One layer card


Red and Gold Christmas

Recently I was lucky enough to win a gorgeous Spellbinders die set in the Glitter and Sparkle blog hop, and today I had chance to play with them for the first time. I thought the large die had a very Christmassy look, and considered cutting it in white to look like a snowflake, but then I saw that the challenge at Merry Monday was Red and Gold and that made me think just how rich and gorgeous it would look cut in gold. And as you can see, I was right!

I'm also sharing this with Fab'n'Funky, where the new challenge is Die Cuts or Punches  and of course at Glitter and Sparkle where this week's Anything Goes challenge gives me chance to show the team what I did with my prize. 


Tuesday, 3 November 2015

Hope You Feel Better Soon at Cardz 4 Guyz

There's a new challenge at Cardz 4 Guyz today, and this time the theme is Hope You Feel Better Soon. It can be pretty difficult to think of a get well card for a man - it's traditional to send flowers to people who are unwell, but floral cards tend to look rather feminine. So do pop over to the site and look what the DT has come up with for you - you might spot some ideas you would like to use for future cards of your own. And we'd love you to share YOUR ideas with us!

My first thought was of man-flu, but I wanted to make something that didn't have to just be used for flu .... what about those familiar black boxes of man-sized tissues?

For the outside of the card, I made a "medical case" from black card with a beige core, scoring a line all around the edge and sanding the whole thing to make it look aged. The corners are photo corners, the handle cut from a scrap of brown card and the "rivets" are tiny brads. The red cross symbol is made from a die cut circle topped with tiny strips of red card.

The glass is just a glass shaped snippet of white card covered partway with acetate to look as if it is half full of water. After sticking it to the card, I used a very fine black marker to draw a line around the sides and base, but not the top, to make it stand out a little from the white background. The two "pills" beside it, waiting to be taken, are Candi. I know most pills are white, but they wouldn't have shown up. And if I'd used blue Candi, my card might have suggested a completely different ailment!


Now on to the inside. I cut a second piece of card, slightly smaller than the A4 sheet the outer card had been made from, and marked, scored and cut lines to give a tissue box shaped pop-up. I covered the box areas of the pop up with black card, then used wood grain paper on the base and a tiny Victorian wallpaper print paper on the upright panel, to suggest a bedside table beside a bedroom wall. 

The "brand name" panel on the box is made by stencilling the letters onto a scrap of black card with a white gel pen. After preparing all the panels, I used a small oval die to cut the "top" of the tissue box, then cut down a real tissue to a suitable size (for a standard sized tissue, this worked out at about two-thirds the side length of the original) and pushed it through the opening so it is peeping out. I stuck it firmly to the underside of the box top, towards the front of the opening so there would be no gap showing when the card is open.

Then I carefully folded and burnished all the folds and stuck it into my outer card.


All the materials used were Very Old Stuff  and all but the wallpaper were snippets (the wallpaper was from a pad I've had for years and years and was still in it's wrapper - how naughty is that?)  so I am playing along with

Pixie's Snippets Playground week 201
Use Your Stuff - Very Old Stash
Craft Your Passion - Anything Goes
Crafting Musketeers - Anything But Square
Craf Rocket Challenges - Anything Goes  


Monday, 2 November 2015

Roses grow on you...

Does anybody remember the "Roses grow on you" TV ads? As I as cutting out the papers for this card I suddenly remembered them - must be at least 40 years since they were aired! And they are absolutely nothing to do with this card.....

For this, I used several papers from a booklet of Raspberry Road booklet that was free with Cardmaking and Papercraft magazine back in 2012 (no, I don't have a photographic memory, it says that on the back.) I  stamped an Anna Griffin sentiment on one of the papers, cut out lots of layers and distressed the edges, fussy cut some roses from one of the papers, and then went to town with layers,  lacey doileys, ribbons, buttons, bows flowers and pearls. When I veer away from CAS, I veer a l-o-n-g way from it!


I'm sharing this with:

Suzy Bee's Bloomin' Challenge - Shabby Chic
Cardz 4 Galz - Buttons and Bows
Make my Monday - Shabby Chic
Creative Card Crew - Off the Edge
Sparkles Monthly Challenge - Pearls and/or Lace     

A visit to the tool shed

It's a stash challenge at The Male Room this fortnight, and we have been asked to use hardware, such as brads, eyelets and charms. That means I had a chance to use some of my very favourite brads (apart from my beloved dragonflies) - screw-headed ones. They go perfectly with wood-effect card and paper, and this time I used them with some Kanban card printed to look like a row of planks - perfect for a tool shed wall. I cut off one plank to "screw" to the wall, and added a peel-off birthday greeting to it. I didn't have a black one the right size or style, so I coloured a gold one with a Promarker (Promarkers take a bit longer to dry than the peel-off pens we used to have when peel-offs were at their height of popularity, but give then 5 minutes and they do a great job).  I added eyelets for the corners, mainly because the legs of my brads were too long for the look I wanted to achieve.

The tools and toolbox are images from DeeDees Digis "Tool Time" set, sized, printed and fussy cut. Mind you when it came to the tiny spaces under the tool box handle I really regretted my decision to fussy cut them, but I've stopped swearing now.


Sunday, 1 November 2015

A cat with attitude

Until a few years ago, I owned the ultimate Cat With Attitude, Charlie. He was such a handsome chap, and could be very affectionate, but, like everything he did, it was always on exactly his own terms.  I don't have many photos of him on the computer, as I was still using old-fashioned film at the time, but here he is demanding a belly rub.


So I thought this rather snarky sentiment from the Dylusions "Laugh till you leak" stamp sheet was perfect for using with a cat image. The cat itself is an old PSX stamp called "Waiting for dinner" which I have stamped with brown Memento ink and then coloured in several shades of grey Promarkers to give a silver tabby effect.
 
The tiny-teeny cat and mouse embellishments are actually tiny buttons. Normally when using a shanked button, I would use pincers or wire strippers to cut off the shank, but these were too tiny for even my jewellers tool, so instead I cut a hole through the topper and mat and inserted the shank through, holding the button in place with clear adhesive. The shanks are so short that the topper sits flat on the card below.
  
I used grey ink to stamp a very delicate fishy background, so as not to draw attention away from the cat - because the cat simply wouldn't stand for being anything less than the centre of attention!
 

I am joining in with

Sisterhood of Snarky Stampers - K is for Kitties
Glitter and Sparkle - Anything Goes
Fantasy Stampers - Animal Antics