Friday, 8 April 2016

A get well card

My computer is still poorly, so maybe this card should be for it! ApologiEs for the poor photos, I'm not used to the ipad camera and editing. I'll stick to the bare facts today
Dies: Creative Expressions
CD: Debbie Moore's Shabby Chic Enchanted Garden
Challenges


Edit: Now I'm back on the computer, here are a couple of better photos - I've made a couple of tweaks to the card too, adding more butterflies and a tiny bit of bling to those on the outside


Thursday, 7 April 2016

AWOL

I'm not sure when I will next be able to post properly. My computer is away being repaired and 
I find it very difficult to post or comment using my ipad. I do have a few posts scheduled and if I'm without my computer for long I'll try to post pics of my makes, after all with no computer I might be spending more time crafting! But you won't be subjected to my usual waffle.

Hope to see you all again properly soon

Jane

Wednesday, 6 April 2016

Inspired by an English Garden - the 2016 edit

Much of my crating inspiration last year came from our weekend visits to gardens - and now we have all week to enjoy  them, there could well be even more! This year's inspiration has already started, thanks to the beautiful gardens at Nymans.

There were some magnificent magnolia trees - Mark took this beautiful photo:


And I couldn't resist digging out a very old stamp of a magnolia (not to be confused with a Magnolia Stamp!) - an old UM, so I can't remember the manufacturer.

First of all I stamped it on a pink background, thinking it would go well with the colour of the flowers, and used white and dark pink pencils to add a little variation to the petals


Then I looked again at the photo - that beautiful blue sky made a wonderful background for the flowers, didn't it? But I wasn't sure I would be able to colour flowers that had been stamped on blue, without them looking too blue or mauve themselves, so as well as stamping it on blue, I stamped on a piece of white card so if necessary I would be able to colour and paper piece the flowers if necessary. However I hoped it wouldn't be, as paper piecing isn't really a major skill of mine, to put it mildly....

I tested various combinations of pens, pencils and inks on a scrap of blue paper, and found that a base layer of a deep pink Cricut fine-tipped pen  partially covered with white gel pen, thinly in some areas and thickly in others, gave a lovely shaded pink to the flowers. Also for my second card I completely covered the pink base card with blue before adding the top panel.


There - I'm much happier with that one! Here they are side by side to compare:


I am sharing the blue card with:

Less is More - White space but not white
CAS on Sunday - Flowers  

Vintage Santa


For this card I have used an image and background paper from a CD called "Classic Christmas". I've combined it with a Spellbinders lacy oval die cut, lightly inked and rubbed with chalk to age it, and a Craftworks Cards sentiment given the same treatment.

The text background is made with silver card dry embossed in a Crafters Companion embossing folder. After embossing, I swooped an olive green Stazon inkpad lightly over the surface. The  dark green vinyl peel off borders and corners are a very old Create and Craft buy - so old that I think Alan and Barry were the presenters at the time!

I am sharing this with

Winter Wonderland - Embossing wet or dry
Crafty Hazelnut's Christmas Challenge - Vintage or Anything Goes
Christmas Card Challenges - Anything Goes 


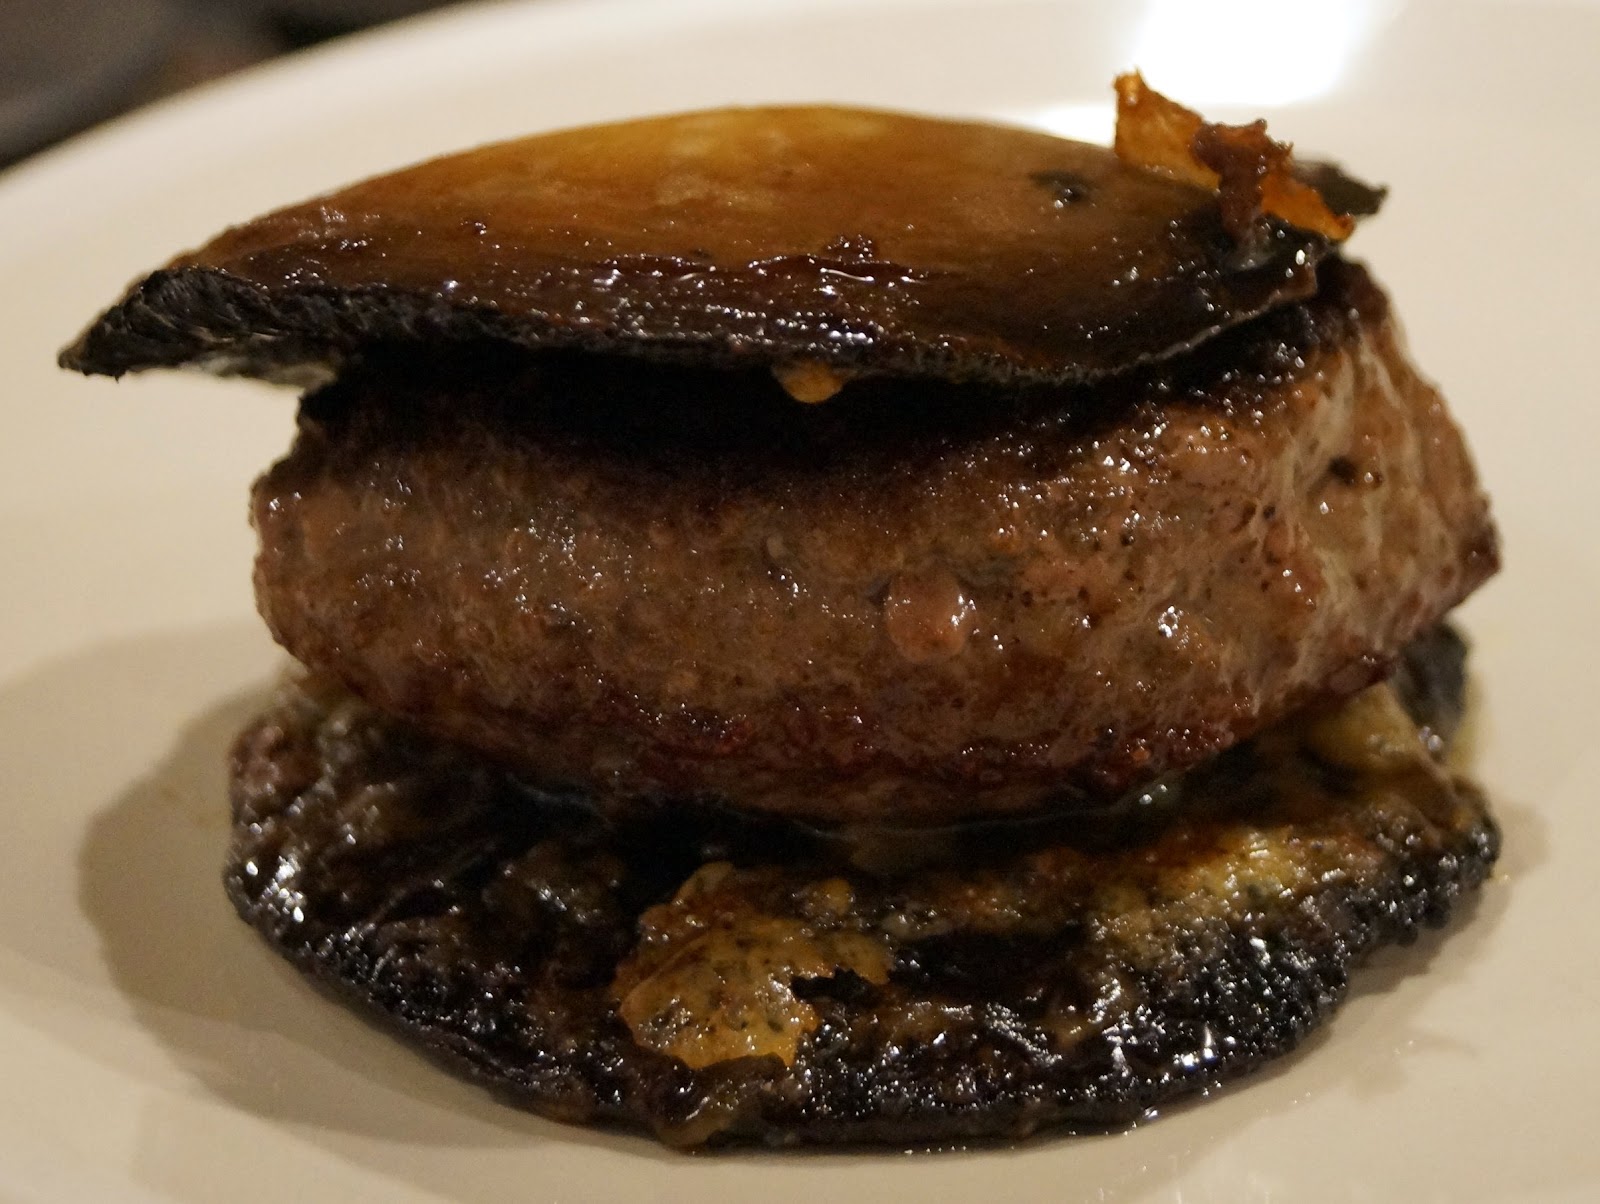
Venison Mushroomburgers

Do you find a classic burger  and chips meal leaves you in a carb-coma?  Bread AND potatoes all on one plate - well, as a kid I could cheerfully manage a chip barm and call it a meal, but now I'm all grown up I want to enjoy rather more variety before I'm full up! When we have a burger meal in a pub, Mark tends to leave all the bread and eat all the chips, but as I love the way the meat juice oozes into the bottom of the bun, I leave the top half and half the chips. Today's dish replaces the bread with mushrooms, which increases the veg content of the meal, reduces the carb, and leaves us both happy!


My latest fridge dive came up with:

A pack of two frozen venison burgers, left over from a BBQ pack bought last summer
a pack of 4 huge flat mushrooms, a bargain at 79p from Morrisons, but what kind of a bargain are they if they hang around in the fridge unused?
The tail end of a chunk of Stilton cheese (about 40g)
4 small tomatoes
about 6 spring onions

other ingredients - oil, balsamic, butter, seasonings.

This gave me the idea of baking the mushrooms to use instead of a roll, and topping them with Stilton instead of the classic burger mayo. I would cook the tomatoes separately as a side rather than slicing them onto the burger.

Preheat the oven to a moderate temperature. Remove the stalks and any tough skin from the mushrooms and lay them, gills upwards, on a baking tray that has been spritzed with oil. Divide the Stilton between the mushrooms and add a tiny knob of butter to each. Season with plenty pepper (I find salt draws too much juice out of the mushrooms)


Halve the tomatoes and slice the spring onions. Arrange the tomatoes in a separate baking dish, sprinkle over the spring onions and drizzle with oil (I used light olive oil) and balsamic vinegar. Season with salt and pepper.


Bake in the pre-heated oven for 20-25 minutes until the mushrooms and tomatoes are tender and the cheese melted and bubbling, while cooking the burgers according to your preference. Sandwich one burger between each two mushrooms, and serve accompanied by the tomatoes. Naturally, we also had chips with ours, it would have been rude not to!


I am sharing this with

Kitchen Clearout at Madhouse Family Reviews


and Extra Veg at Utterly Scrummy Food 4 Friends and Fuss Free Flavours


Tuesday, 5 April 2016

More inspiration from Nymans

I have posted this group of cards in two separate posts because although the inspiration behind them is the same, the theme and execution are very different. If you haven't already seen my first post about the beautiful stained and fusion glass work I saw at the weekend, why not take a look before reading on?

While I had all my encaustic painting stuff out, I decided to try another design inspired by the collection at Nymans. This one had magical swirls of reds, oranges and greens to set off the silhouette. The glass is fused in layers, but with encaustic art, the colours all go directly on to each other and I know from experience that using reds and greens together results in a muddy finish. So I kept to red, yellow and orange shades over the stamped area, and used green suction patterns on a separate sheet of card to create a background layer.

These cards served as a reminder to me to check the transparency of each wax before using it - the Stazon stamping will resist wax as long as there is little or no opacity to it. Anything with added white wax will just obscure it, and I found that my orange wax has a tendency to do the same, so in places my fairy looks as if she is emerging from the morning mists!

Again I have made two cards with slightly different placement of the colours and techniques.


I am sharing these with

Craft Rocket Challenges - Mythical Creatures
Crafty Creations Challenges - For a young girl (all little girls love fairies, my 6 year old granddaughter went wild for these cards and spent all of yesterday using the same stamps)
C.R.A.F.T. Challenges - Make your own background  

Here there be dragons......

Last week my husband retired from work, and to celebrate we went away for a lovely weekend in East Sussex. Everything was perfect - glorious weather, a lovely hotel where we had a beautiful suite with a view over a llama farm (!), wonderful meals and visits to some fascinating and beautiful places.

One of the places we visited was the National Trust property Nymans - you can read about our visit over on Mark's blog, and I'm sure you'll be seeing lots of posts inspired by our trip on here - I've just reached out my Magnolia tree stamp, for example.

Inside the house at Nymans, I was fascinated by a small collection of stained and fused glass work which was displayed beautifully in the rooms each piece had been inspired by. Photography was not allowed, but you can see the artist Elizabeth Lamont's wonderful work on her website. The magical colours and silhouettes reminded me of encaustic paining, and when we got home I couldn't wait to get out my encaustic paining tools and waxes and try to recreate the atmosphere of some of the pieces.

For the two cards in this post, I used the lovely Linda Luckin dragon-serpent silhouette stamp, sadly no longer available, stamped onto glossy card using Stazon ink and then painted over using a hot iron and waxes in clear, turquoise, blue and purple. I finished each dragon with a little glitter in matching colours.


I am sharing these with:

The Male Room - Magic/Fantasy
Craft Rocket - Mythical creatures
Shopping Our Stash - Hidden or tricky element (encaustic painting)
Retro Rubber - Anything Goes (the stamp is around 8 years old)