Monday 22 November 2021

Christmas easel card

 I've been having a good rummage through the snippets box and the Christmas snippets box. In my main snippets box, I keep a section for "basics" - black, white, kraft, cream, silver and gold - where i know that even the tiniest scrap can be used. However those tiny scraps build up - and this card has shifted an awful lot of the scraps of kraft. 


I added a sheet of tartan paper from a pullout collection that was in a craft mag a few years ago, and added lots of snippets that were part of the same collection - even the snow scene tag is a snippet. These are the very last scraps of the papers - but I saved a download of the designs and I'm sure I will revisit them - especially that pretty snowflake paper. 

In the spirit of using things up, the felt snowflake border is the very last scrap from a huge spool of it I've ben using for years,  and the crystal "fruit  pastilles" are the last three from a much loved sheet. I'll have to try and source some more of those! 

I am sharing this with 

Pixie's Snippets Playground - Challenge 416

and the challenge which this month is acting as a "sister" challenge, with Miss Di as guest designer, 

Christmas Kickstart - Christmas Snippets  


Friday 19 November 2021

Feeling slothful

 My granddaughter is crazy about sloths, and with her birthday approaching I couldn't resist this sloth stamp that came with a recent issue of Creative Stamping. 


The accompanying magazine included instructions for a bridge fold card which I adapted slightly to make it stronger, as it need to survive international postage. Everything is coloured with Promarkers, and the sloth isn't that pale in real life, but these gloomy November days mean that everything has to be photographed using flash and sometimes it just isn't possible to edit out that washed out look (same goes for humans, too, on these dreary November days!) The background is made using stamps from the set - there are two different contrasting backgrounds although one of them is hiffen behind the image, in the recess of the bridge fold. 

I am sharing this with 

Addicted to Stamps and More - Birthdays 


Little Red Wagon - No patterned paper 

AAA Birthday - Animals 


Monday 15 November 2021

Acetate Butterfly

 This butterfly wasn't going to be acetate - I had planned to make a one layer card, with the butterfly heat embossed on the background, but then I got an urge, and you know what it's like when you get  an urge.... 


I started with my blank card, masked off the edges and filled the space with blended inks in shades of orange, gold and brown. Then I used a large Crafters Companion collage stencil to lightly stencil all over the background in one of the orange shades,  and used stamps from a recent Indigo Blu magazine kit  to randomly stamp words and a tailoring pattern stamp over the background in brown. 

This is the point where I was going to stamp and emboss the butterfly, also from the Indigo Blu set. But I felt it would have a bit more life to it if it was a separate layer, so instead I stamped and heat embossed it on acetate. As I heated it and watched my acetate curl and melt into a soggy mess, I remembered that I have a pack of heat embossable acetate....  So one more butterfly later, here is the finished card. 

I am sharing this with

Crafty Calendar - Anything Goes  

Taylormade Cards 4 U - Fall colours 


Tuesday 9 November 2021

The Archer

 No, not the radio series (and if you are in the UK,  you may well be humming the theme tune now) but a gnome archer complete with very rustic bow and arrow. 


The stamps I have used are from a NBUS set I won from Imagination Crafts a few months ago. The packs weren't labelled so I don't know which of their brands it comes from,  but I have a whole host of gnomely images. I haven't used them so far as nearly all are Valentines Day oriented and it was after V-Day when I won them. 

I used the arrow image to create a wobbly "flight" of arrows across the page to give the sentiment somewhere to sit. Then I stamped the archer, coloured him with pencils and fussy cut him, and attached with 3D adhesive. 

I am sharing this with 

Allsorts - from boys to men  

AAA - sketch/gnomes  


The Male Room - gnomes  


A bit more time to craft extra - anything goes


Sunday 7 November 2021

London in the Snow

 Yesterday I shared one of the cards I made with the stamp sets I bought from Clearly Besotted's October release. Now I've used the second set - also NBUS until now. 


First I made the winter sky background with blended inks and splattered gesso, then I stamped, coloured and fussy cut the images and attached them, with the buildings image flush with the background and the roadside image raised slightly with 3D adhesive. I love that so many London icons are there - how many can you spot? 

I am sharing this with 

Crafty Hazelnut's Christmas Challenge - Anything goes

Watercooler Wednesday - All about Occasions  


Pearly Sparkles - Merry Christmas 

NBUS - NBUS

Craft Rocket - Winter/snow


Saturday 6 November 2021

Meery Christmas!

 No, that isn't a typo.  It's a meerkat themed Christmas card. With cacti, of course. 


I bought a couple of stamp sets from the Clearly Besotted October release, and what with family visits and health issues have only just got around to playing with them. This is my first make from the first set. 

I used die cut circle waste and masking tape to create a dome shaped space and blended red ink into it. Then I stamped, coloured and fussy cut the meerkat and cactus images and attached them with 3D adhesive. 

I am sharing this with

Sweet Stampin' - Use red 

Fab'n'Funky - Christmas is getting closer

Critter Crazy Challenges - anything goes with a critter

CAS Christmas - Christmas Critters 


Sunday 31 October 2021

Embossed embossing #2

 Catching up after the family visit, here's a last minute second entry to Let's Squash It, with a different form of embossed embossing. 


This time I used watercolour paper which I had dampened, then swiped the embossing folder (an old magazine freebie) with distress inks before embossing. This left the paper clean(ish!) on the raised area and with a blended watercolour background. Once it was dry, I smooshed a clear ink pad over the raised area and embossed with clear powder. However being a nice juicy pad and a fairly open design, I have actually embossed the whole of the lower area of the card as the ink went onto the flat areas too. Oh well, it gives it a nice sheen and a contrast in texture to the unembossed space at the top, which I finished with a die cut butterfly. 


Saturday 30 October 2021

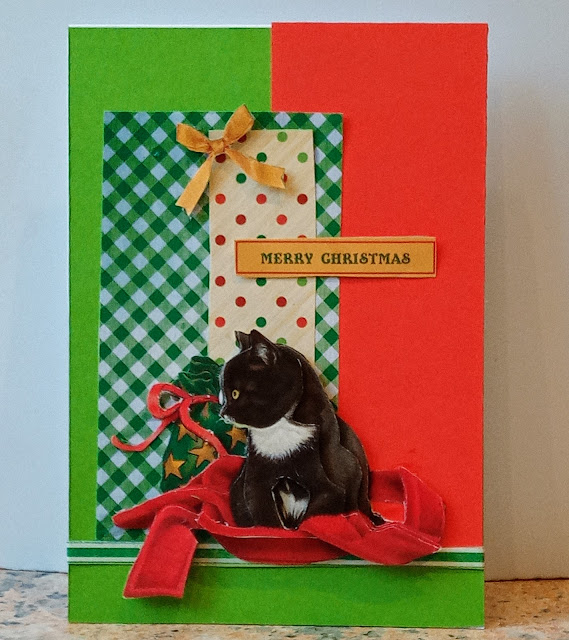
Christmas Kitty

 A very quick post to share the second card I made for the Cat Lovers Hop - getting in just before it closes for the year! 


This is made using a very old Dutch decoupage booklet - it must be over 20 years since I bought it and I've still only done about half a dozen of the 24 designs. I get easily bored with all that fiddly cutting out and the lack of creativity - but on the other hand it's a handy thing to be able to do on my lap while all my craft supplies are packed away for the family visit. 


I am sharing this with 

The 2021 Cat Lovers Hop at Her Peaceful Garden 

Crafty Hazelnut's Christmas Challenge - anything goes  

Jingle Belles - Not a creature was stirring 

Show us your Pussycats - furrything goes  

Rudolph Day at Scrappymo's 


Friday 29 October 2021

Black and white cat

 .. and if you are not now singing Postman Pat I'm not sure we can be friends. 


It's the 2021 Cat Lovers Hop over at Her Peaceful Garden and I'm very late to the party. But I have a very good excuse, miss! When I signed up to play along, I didn't notice that it clashed with the dates my daughter and her family were coming over from France to visit, the first time we've been able to get together since Christmas 2019, and I've been AWOL all week as I didn't want to miss a precious moment with them all. 


Anyway, I'm here now and  have managed to make a couple of quick cards for the hop, so here is the first. The kitty stamp is a very old unmounted stamp, I think it's either PSX or All Night Media, and the sentiment is a Tim Holtz snarky sticker. I've kept it masculine looking by keeping the whole card to black and white, just adding interest by covering the milk bottle with Glossy Accents to give it a glass like effect. 

I am sharing this with 

Cat Lovers Hop 2021

Stamping Sensations - Animals, birds and bugs 

Cardz 4 Guyz - any animal 

The Male Room - black and white


Wednesday 20 October 2021

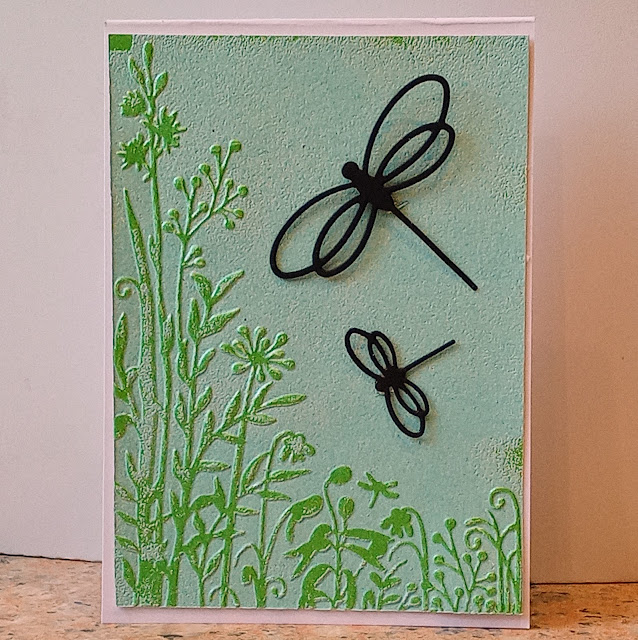
Embossed Embossing

 This month's Let's Squash It challenge is a technique I love - heat embossed dry embossing. 


For this card I used an NBUS embossing folder, which was a magazine freebie some years ago. I've got quite a few NBUS embossing folders, especially ones that are Things rather than patterns, because I'm never quite sure how I'll use them. 

Anyway, I embossed this one on green pearl card, first swiping the flat surface of the folder with embossing ink. Then I heat embossed with baby blue pearls embossing powder. With one dragonfly already in the scene, I absolutely HAD to fill that space with a couple of die cut ones! 

I am sharing this with 

River of Creativity - Wildlife 

NBUS - NBUS  

Let's Squash It - Double Emboss 


Sunday 17 October 2021

Further Festive Fungi

 A few days ago, I shared some Christmas cards that Mark had asked me to make for his foraging friends. Today I have another for you - actually it is one of a pair of identical ones. I was printing a background big enough for two cards and it's as easy to print two copies of a digi as one, so it made sense to make two. 


I wanted a digi of morel mushrooms, and found this lovely one at Power Poppy. The only snag is, they are sprouting from a bed of very un-Christmassy violets. However by colouring the violets red to blend into the background and covering them with die cut poinsettias, I think I managed to conceal them! 

The background is from Joanna Sheen's "Country Diary of an Edwardian Lady" CD and for a bit of variety I printed it onto thin printable acetate (I got mine from Create and Craft about 750 years ago - to ease its journey through the printer, the printing side is matte and there is a narrow paper strip along the leading edge for the printer to grab hold of). 

Finally the sentiment, which makes me giggle every time I see it and is the reason the mushrooms had to be morels. I generated this with my Dymo electronic label maker, my new favourite toy. 

I am sharing this with 

Crafty Hazelnut's Christmas Challenge - anything goes  

CD Sunday Plus - anything goes


Saturday 16 October 2021

Everything Pink at the Sisterhood of Snarky Stampers

 I was delighted to be invited to be the guest designer at the Sisterhood of Snarky Stampers, thanks to being chosen as Queen of Snark recently. The theme Edna has chosen is "Everything Pink" .


Not being a great fan of pink, there isn't a lot of it in my stash but I  had a rummage and came up with: 

Pink patterned paper

Pink ink

Pink foil - used to cold-foil the edge of the patterned paper

Pink glitter gel - stencilled over part of the background

Pink twine

Pink liquid pearls - dotted around the perimeter

And with such a variety of pink stuff, the sentiment, from a Tim Holtz snarky sentiments pad, was obvious! Then I had to find a stamp of somebody who looked as if they might be saying that - this rather puzzled looking lady from a very old Viva Las Vegas pound o'rubber was just the job. 


It's great to be back on board with the Sistahs, I hope you will join me there. Dress code: Pink. Snark: Optional but preferred. 


Wednesday 13 October 2021

Festive Fungi

 The other day, Mark came up with quite a challenge for me - as a keen mycologist, he wanted me to make some fungi themed cards for his foraging friends. Fungi themed CHRISTMAS cards. 

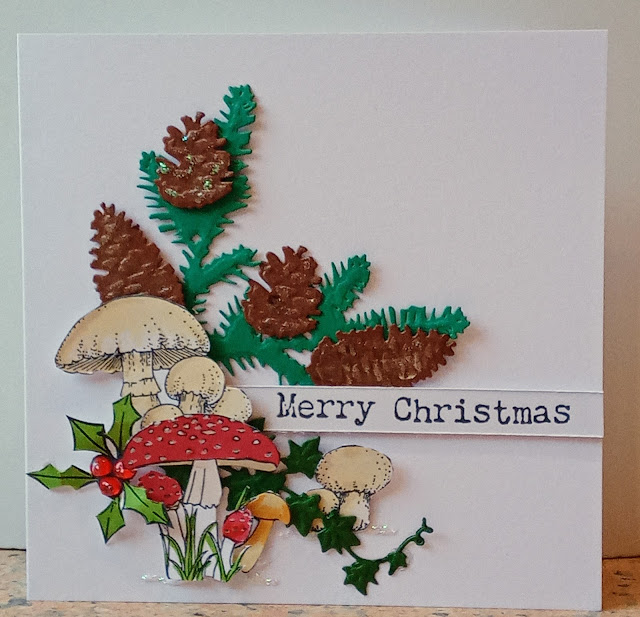
Well, mushrooms and Christmas aren't usually a crafting combination that springs to mind, but I had a rummage through my stash and found some lovely fungi themed stamps and combined them with some festive stamps and dies. 


The first card is an absolute snippet-fest! I used snippets of card in greens and brown, plus lots of my white snippets. I cut the pine boughs using a very old Spellbinders die set and the ivy using a die I bought from Joanna Sheen, although I can't recall whether it is her own brand or a Marianne Creatables one. The fungi are stamped with a very old Graphicus set of botanical stamps (now reimagined and sold by Chocolate Baroque under the name Nature Table) and a Hunkydory set that was a magazine freebie 4 or 5 years ago. I coloured all the images with Promarkers and fussy cut them. 
I christmasified it with a holly stamp and sentiment, and added clear liquid pearls for the holly berries, then used Stickles to give a frosty ground for the fungi to grow from and Wink of Stella to add a touch of frost to the cones. 

I am sharing this card with 

Pixie's Snippets Playground - challenge #413

Watercooler Wednesday - All about occasions  


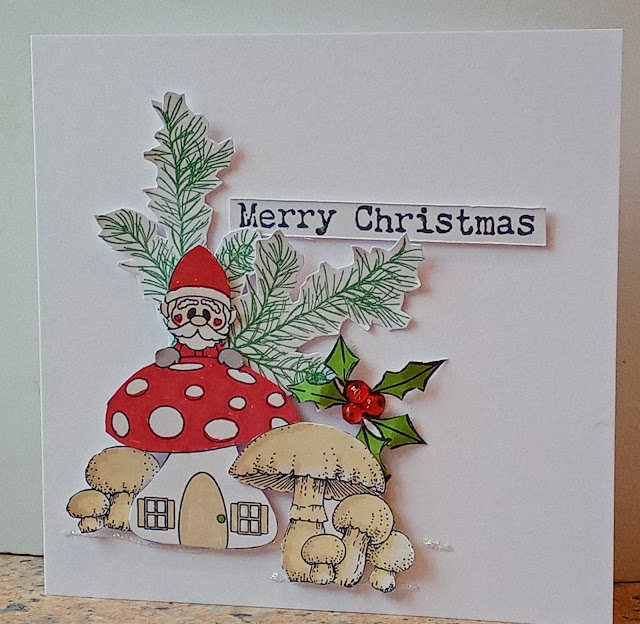
My next card is a cute version. To the same basic elements, I've added a gnome - coloured as a Santa version - peeking over a toadstool. Apparently I'm not supposed to call it a toadstool, I'm supposed to call it Ammanita Muscari. But it looks like a toadstool to me.  

I'm sharing this with 

Passion for Markers - Make it Cute  

Crafty Hazelnut's Christmas Challenge - Anything Goes


On to my third and final card (for now - I am working on more fungi themed cards in a different style) and this is my favourite of the three, even if it isn't quite as festive. I just love the way those Oyster Mushrooms turned out! I tore the top of the tree stump rather than cutting it, to make it look as if the tree had fallen down naturally rather than being hacked with a chainsaw (and anyway I haven't  got a chainsaw). 

I am sharing this with 

Craft Rocket - Autumn and/or Mushrooms 

Retro Rubber - Anything goes  (those mushroom stamps are at least 20 years old, possibly nearer to 25!) 


Friday 8 October 2021

Christmas Deer


Another quick-to-make Christmas card to help boost the stock, this time using elements from The Paper Boutique's "A Christmas Visitor" collection.  These beautiful papers and toppers really need no help to look gorgeous, although I did enhance all those Christmas Roses with a gentle swipe of Wink of Stella. 

I am sharing this with: 

Crafty Hazelnut's Christmas Challenge - anything goes 

Sparkles Christmas - Flora and Fauna 

A bit more time to craft extra - anything goes 


Juke Box Jury

 Does anyone remember Juke Box Jury, that TV show of the late 1950s/early 1960s where new singles were played sand a panel of celebrities declared them a "hit" or a "miss"? I always think of the catchphrase as having been "I'll buy it and give it 5" but I think that was actually one of the other pop shows, maybe "Ready Steady Go!". Anyway, it was shows of that era and genre I had in mind when I made this card. 


The Juke box and sentiment are stamped using a pair of Hunkydory stamp sets and coloured with Promarkers. The papers are a selection from my stash, and I've added a die cut fanfare of notes and a length of music stave self adhesive border that I got from a remnants box at a craft show a few years ago. 

I am sharing this with 

Crafty Hazelnut's Patterned Paper Challenge  - anything goes

Shopping Our Stash - Musical Notes 

Use Your Stuff - Retro  

Passion for Markers  - Use Red 


Monday 4 October 2021

Oh Christmas tree

 Another quick make to help fill the Christmas card box. 


I've often wondered why Hunkydory printed card sheets are laid out the way they are, and it's taken me all these years to realise they've been planned that way in order to give us an almost-ready-made Z-fold card. Just a couple of scoring lines and the basic card is there waiting to be embellished. Add a topper and sentiment from the same bundle and there you go. 

I am sharing this with 

Christmas Crafts All Year Round - something that starts with S or T  (Tree - and some snow) 

Crafty Hazelnut's Christmas Challenge - Anything goes


Sunday 3 October 2021

Halloween

 I don't really bother much with Halloween, it's not an occasion that has ever held much appeal for me, so I don't really have any Halloween related stash. However, some of the elements in the Graphic 45 "Master Detective" range work pretty well for Halloween related cards, so I've made a card that will fit several challenges. 


This is a large 20cm square card and papers, a tag and a sentiment topper from G45. The cobweb is a die cut (sorry, I can't remember the brand of the die). 

I am sharing this with 

Just Us Girls - Halloween  


Country View - Autumnal colours/Halloween  

Crafty Calendar - Halloween  

Pearly Sparkles - Autumn and/or Halloween 

Taylormade Cards 4U - Orange and Black 


Saturday 2 October 2021

I love coffee, I love tea....

 I love a Java Jive and it loves me....

Those old enough to remember the song may well be humming along now. 

Today I have used another piece of the hand made paper I made the other week. 


This time it is paper made with coffee grounds added to the pulp. As well as a creamy coffee colour,  the paper has a subtle scent of coffee too, so naturally I had to make a coffee themed card with it. I thought my old Cuttlebug swirls folder would be perfect for a background, although wasn't sure it would work with the paper, but it did. I swiped an inkpad over the raised surface to emphasise the swirls. The paper was bigger than the embossing folder, but I didn't want harsh cut edges so I revived the old trick from when we all were Mulberry paper mad, back in the 1990s, and ran a wet paintbrush along the line where I wanted the paper cut, then very gently teased the paper apart along the wet line. 

I stamped and coloured the image, using alcohol markers, fussy cut it and added the stamped sentiment. 

I am sharing this with 

Allsorts Challenge - I love.... (Stamping, embossing, colouring, "I love coffee") 

Make My Monday - embossing (either kind) 


Friday 1 October 2021

What I've been cooking/eating during September

 I don't have many photos for you this time as most of what I've cooked hasn't been very photogenic (although sometimes, that didn't hold me back) but here's a rundown of some of this month's goodies. 


Nachos -  I had an avocado that was starting to go soft, and a handful of tomatoes from the garden (most were lost to blight) so I made the tomatoes into a salsa, then fried a chopped red onion, added a tin of red kidney beans and some chilli powder and roughly mashed the mixture. I spread tortilla chips over a foil lined baking tray, layered the bean mixture and salsa over the top then grated a little cheddar cheese over the whole thing and gave it a 15 minute blast in a hot oven. Then I mashed the avocado with a pinch of salt and the juice of half a lime, and topped my nachos with dollops of that and of sour cream. Perfect for grazing in front of the TV! 


Then we went away for a few days - I've already shown you a photo of the lovely afternoon tea, but here's another look at it. I wish we could buy those little pots of Rodda's cream in the shops, a whole pot of clotted cream is often too big for the two of us. 

Now a section where I forgot to take photos. Although the break was for our wedding anniversary, we also wanted to cook something special at home, so we treated ourselves to a piece of rolled rib of beef from the butcher - a bigger, more expensive piece than we would normally buy. Mark made roast beef and Yorkshire puddings - he makes the most amazing Yorkshire puds. Next day, there was enough beef left to have it sliced and reheated in the leftover gravy, There were still some scraps left, and a little bit of gravy. Not wanting to waste any of the beautiful meat, I thought about mincing the scraps to make a cottage pie, but we decided to try something different. Mark trimmed off all the fat and rendered it down very slowly to give us a little pot of beautiful beef dripping (and the crispy bits left behind after draining off the dripping were yummy "beef scratchings". The rest of the scraps I diced, put into a pan with a small chopped onion, the leftover gravy and enough water to cover, then simmered very gently for an hour or so. Then I separated the solid matter from the liquid, and used a stick blender to whizz up the solids with a knob of butter into a very thick paste. The liquid went back on the heat and I boiled it hard to reduce to a few tablespoonfuls, then mixed it into the meat mixture to give a thick spreading texture and seasoned it. I packed this firmly into a small basin then poured melted butter over the top. The result was a delicious potted beef that did us another three meals (and that was us being greedy with it because it was so good). So our apparently expensive piece of beef gave us 5 delicious meals each, plus dripping, and not a single scrap was wasted, much to the disgust of our semi-tame crow! 

Right, enough writing, back to the pictures! 


Back in August, I won one of those meal-in-a-box kits for a Korean meal. I was actually pretty unimpressed with it,  the produce supplied wasn't very fresh and the cooking instructions unclear, even for an experienced cook like me. But it DID include a way of preparing and cooking tofu without all the breaking up, spattering and disintegrating that I usually encounter. 

First, wrap the tofu in several sheets of kitchen paper. Place it between two plates and put a weight (eg 3 tins of tomatoes) on the top plate, and leave for a couple of hours. Then remove the paper, dry the surface, dice the tofu, spread it on an oven tray, drizzle with oil and bake for about 20 minutes in a hot oven. The result is lovely light, crispy tofu which I simply tossed with spring onions and chillies and scattered with salt and pepper. 


I served the tofu with some noodles, fried with beansprouts and finished with dark and light soy sauce, and drizzled home-made sweet chilli sauce over everything. 


Still sticking with the Asian theme, I cooked a dish from this lovely old book. It's one I bought in Hong Kong back in 1978, and I think it was pretty old fashioned even then. It is bilingual and packed with the kind of dishes that were normally only served in the restaurants that didn't offer English language menus because they thought that we "gwei-los" wouldn't like what was on offer. It's a fascinating book and there are some delicious dished in it, like these pork meatballs, slowly braised on a bed of Chinese cabbage with stock, soy sauce and wine until the cabbage sort of melts into a soupy stew. It really doesn't look the least bit attractive - here are two photos, before cooking and once cooked. 


That unappetising looking sludge tastes DIVINE! It recaptures flavours I remember so fondly from street food stalls and dim sum palaces in Hong Kong and across South East Asia. 

I had a bit of an incident with a watermelon the other day, I dropped it on the kitchen floor and it shattered. When we sliced up the remains to see what was rescuable, look what fell out! 


Isn't that lovely? The heart shapes weren't cut at all, they just came away like that. 

The end of September turned chilly, in fact yesterday we put the central heating on for a while. And to me, the start of the chilly season means the first Lancashire Hotpot of the season. 


Served, of course, with red cabbage, sliced beetroot and carrot-and-swede. It's time to get the wooly jumpers out! 


Vintage cars

 While I was rummaging through old kits to find the Hunkydory one for my recent robin cards, I also lifted out the Hunkydory Planes, Trains and Automobiles kit to play with. 


I used a background paper and two toppers from the kit, plus a stamped sentiment and a sheet of light brown satin paper, which I embossed with a cog folder. I distressed the edge of the background paper and inked all the edges, then used my beloved screw headed brads to attach the cog paper to the background. 

I am sharing this with

Cardz 4 Guyz - use some metal  

Creative Crafting Uncles - Cogs and/or Sprockets


Watercooler Wednesday - All things Masculine