Sunday 27 December 2015

Ring in the New Year at CD Sundays

Good morning everybody! I hope you all had a good Christmas. I don't actually know whether I did or not - NOT because I drank so much I can't remember a thing about it, but because I'm writing this in advance, as by the time you read this I will be away visiting family in France and giving my younger two grandchildren lots of Christmas cuddles.

I'm back with another GDT post for CD Sundays and our theme this time is "Ring in the New Year".  I've used a decoupage sheet from La Pashe's "Christmas with the Wrinklies" CD. Those bell ringers have jumped the gun a little bit - just look at the clock, it's still five minutes to midnight! It's tiny details like that that make me love the La Pashe designs so much!

I wanted to use a tartan backing paper but none of the ones I had on CD were as good a match for the colours in the image as this one from the DCWV "Stack 9" 12 x 12 pad, which must be the most useful paper stack I have ever owned! I've made a simple easel card and to give the stopper plenty height, I attached it with a double layer of foam pads.


Wednesday 23 December 2015

Homespun at Less is More

Another favourite challenge that my travels have kept me from joining in with recently is Less is More - this week the theme  is Homespun and I'm delighted to be back and joining in again!

I cut a scrap of gingham paper with pinking shears and used a brown marker to make faux tacking stitches,  then added the die cut dressmaker's dummy (it's actually brown, not black as it appears on the photo - and I'm afraid I don't know which die was used as I received it in a swap)  and finished the card with some buttons and a charm of dressmakers' scissors, tied to a mini-hank of twine.

Back to the snippets box

Thanks to all my travels I haven't been crafting much and my posts have all been scheduled, or using cards I made before setting off, so I've not been out to play in the Snippets Playground for a couple of weeks. But at last I've managed to scrape together time to get my craftiness on again, and this card is an absolute snippet-fest! As well as using up snippets of several different patterned papers, it includes the last two sentiments from a sheet of die cut ones I've had for years AND loads of die cuts of my own that are left over from previous projects - you know, those times you cut something and the size or colour just doesn't look quite right to use it in the way you've planned, so you put it away with all the other might-come-in-handy-sometime stuff.


I made it an easel card simply because I had too many bits and pieces to use up on a normal card front, and the only new things, apart from the base card, are the green layering card and the wooden frame.

The Snippets Playground is open for two weeks this time, with lots of goodies to be won, so why not come and play over there and help us to cheer Di up?

Saturday 19 December 2015

Merry Christmas Mark

As you probably know, my husband Mark is crazy about chillis - growing them and cooking them, and I try to make him chilli themed cards whenever possible, even at Christmas (and if anyone knows of a range of stamps that includes a chilli, please let me know!)

Because I've been unable to find a suitable stamp, I hand drew a chilli a couple of years ago and scanned the image, and have used it in several different ways. This year I resized it to comfortably fit a DL sized card, then printed it and cut it out. I stamped the Christmas greeting randomly all over the image, then mounted it onto white card and trimmed to leave a narrow border.

Next I die cut lots of snowflakes using a die that was a magazine freebie a year or two ago and stuck them randomly all over my DL card, trimming any overlapping edges. I used 3D adhesive to mount the chilli on top of them and then finished the snowflake centres with "chilli red" gems.


I'm sharing this with

The Male Room - Christmas or Seasonal Greetings (actually in my case it's more SEASONING greetings!)
Dies R Us - Winter - use snowflakes

Saved by the freebie!

I really didn't think I was going to be able to join in with the latest Butterfly Challenge, where the theme is All Kinds of Fairies, because I don't have any fairy-themed stash. However the latest issue of Papercraft Essentials came to the rescue - the cover gift this time is a lovely fairy and butterfly stencil and set of stamps, just what I needed!

I sponged through the stencil onto white card, using Brilliance ink in pink to give a soft sheen and darkening some areas with a touch of purple ink. Then I stamped the "sparkle" from the wand in silver and embossed it with holographic powder and added one of the sentiments from the stamp sheet.

Because the stencilled image is so big, I wanted to use an 8" square card blank, but didn't have one, so I took two sheets of A4 and used my scoring board to score one along the DL/trifold scoring line. Then I attached the other sheet to cover the small flap, closed the card and trimmed it off so the edges were flush.

The image was mounted on metallic pink card - it looks a lot darker in the photo than in real life - and I added lots of sparkly crystals to emphasise the sparkly sentiment.


I'm also sharing this with
Fan-tastic Tuesday - Make it Sparkle
Allsorts Challenge Blog - Anything But Christmas
Inkspirational - Bah Humbug!

Holiday at Twofers

It's time for a new challenge at Twofers, and  this time our theme is HOLIDAY. With the festive season here, we were originally thinking of holiday in the Christmas sense of the word, but if like me you live in the UK and think of holidays more as seaside trips with donkeys, buckets and spades and fish and chips on the prom, then feel free to interpret it that way - or to celebrate any other holiday!

I'm still frantically making my last few Christmas cards, so I've gone for a very simple card with gold embossing on black. The tree is a very old unmounted stamp which I received in a RAK, so I don't know the brand, and the corner is from Clarity Stamps and is also Very Old Stuff, in fact it has the honour of being the very first clear plastic stamp I ever bought! Most of the early ones I bought have got dry and cracked now, but this one is still as good as new despite probably thousands of inkings.


I'll leave you with a thought - if White On White is WOW, is Gold On Black GOB?????

I'm joining in with Crafty Hazelnut's Christmas Challenge which this week is Anything Goes as Long as it's Christmas

Friday 18 December 2015

Recipe - Egg and Cauliflower Cheese


This is a deliciously retro dish that is Proper Comfort Food, the sort of thing to tuck in to on a grey, rainy day - something we've had a lot of recently! I've written this post in conjunction with British Lion Eggs, who have an informative page about Egg Nutrition - you may be surprised to learn how few calories each egg contains, especially for something packed with so many vitamins and minerals. I love eggs - they are the ultimate convenience food, and can be used in so many ways.

Egg and Cauliflower Cheese
makes two hearty servings

4 medium free range British Lion Eggs
1 small cauliflower
125g finely grated Cheddar cheese
50g butter
50g plain flour
450ml semi skimmed milk
¼ teaspoon dry mustard powder
pinch each of grated nutmeg and cayenne pepper or chilli powder
2 tomatoes, thinly sliced.

Hard boil the eggs then cool, peel and halve them. TIP - to get eggs with no dark rim around the yolk, have them at room temperature then place in cold water and bring to the boil. Boil for exactly 8 minutes (for medium sized eggs) then plunge immediately into cold water and allow to cool. They will peel more easily if, after the first few seconds in the cold water, you gently crack the shell all over then replace in the water to finish cooling.

Break the cauliflower into florets and cook in boiling salted water until just tender. Drain and arrange with the egg halves in an ovenproof dish. Heat the oven to 200 C/400 F/ gas mark 6


Make the sauce  either by the traditional roux method or the super-simple way - put the flour, butter, seasonings and milk into a saucepan and stir with a whisk until boiling and thickened. Only use this method if the sauce will be cooked further, or you will get a raw flour taste! Stir in three quarters of the grated cheese, and when melted and smooth, spoon carefully over the egg and cauliflower, making sure everything is covered.

Arrange the sliced tomatoes on top and sprinkle with the rest of the cheese.


Bake in the pre-heated oven for 25-30 minutes until the cheese is browned and the tomato cooked, and serve with a green vegetable plus potatoes or bread to help you mop up every scrap of the sauce.


I am joining in with Simply Eggscellent at Belleau Kitchen - it's an Anything Goes month this month.


NOTE - I have received a gift from British Lion Eggs in exchange for sharing this recipe - however it's one I would have been sharing with you anyway. You probably know by now that retro comfort food is one of my signature styles, especially at this time of year!

Wednesday 16 December 2015

Crafting with a kit for a change

A few months ago, I won two craft kits in a blog hop. These days I seldom use kits, preferring to design things from scratch, and the old kits I bought are gradually being broken up and the elements used individually, but these two kits included stickers that had been obviously custom designed for the job, with white outline stickers and sparkly hologram shape stickers that fitted exactly into the outlines so I decided to use them exactly as shown on the packet.

It was actually extraordinarily relaxing to simply follow instructions and have everything ready to assemble, cutting out all the stress of searching for that bit of *exactly* right paper that you know you have somewhere, and a chance to enjoy some pure crafting without any original art involved - in fact it reminded me of why I used to enjoy following a knitting pattern so much in my knitting days.

Here are the sparkly and pretty fruits of my labours:


I'm sharing these with Fan-tastic Tuesday where this week's twist is "Make it Sparkle"

NOT a Christmas card

Is anyone else getting a bit tired of making Christmas cards yet? I've got one or two more to share with you before the big day, but I think I've now finished making them at last - although thanks to being  on the Sparkles Christmas DT I'll be making them again before the dust has settled on the tinsel! And in 2016 I promise I absolutely WILL make two cards or tags to go into my Christmas box every week, so there'll be no last minute rush to make me tired of them.  Well, that's what I say every year, one year I might actually listen to myself!

Anyway, it was such a nice change to be making something un-Christrmassy  that by my standards I went way over the top..... CAS this is most definitely NOT. Is it vintage, or distressed, or shabby chic? Or perhaps a bit of all three - I'm never quite sure where the dividing lines between the three lie. I suppose they overlap a lot. If I was really clever at graphics, I would now insert a Venn diagram with three overlapping circles to represent the styles, and this one would lie in the bit where all three overlap.

The images I have used are from a download I won at Suzy Bee's Blooming Challenge and the papers and embellishments are all from the Dovecraft Curiosity Corner range, with the exception of the die cut heart which was cut using a magazine freebie.

I am playing along with

Alphabet Challenge blog - V is for Vintage
Suzy Bee's Blooming Challenge - add buttons or a button
Mod Squad - Anything but a Christmas card   

Sunday 13 December 2015

A Cool Yule at CD Sundays

I have some exciting news to share with you today - I have been invited to spend 3 months as a Guest Design Team member at The CD Sunday Challenge Blog and today is my first post for them!

The theme this fortnight is "A Cool Yule" and I decided to use the Katy Sue Designs double CD, "Christmas Spirit". I love this set for the unusual, witty images it contains - in fact I love it so much I couldn't narrow my choice down to one and ended up making TWO cards.

The first is a simple gatefold card with the main image on the inside. Note how I have added white panels to the inside flaps of the card - whenever I make a dark coloured card that has no insert, I try to incorporate some kind of writing space into the design.


For my second card, the image included  the words "The perfect present" but I thought this wonderfully naughty sentiment from the Dylusions "Christmas Words" stamp set would work perfectly with this cool looking lady, so I fussy cut around the image to remove the words and made a panel featuring the image with the new sentiment.


I'd been feeling rather sad because I knew this would be posted too late for my second card to be entered into the "Naughty Christmas" challenge at the Sisterhood of Snarky Stampers,  so I was delighted when the latest challenge turned out to be X is for Xmas and I could still play along!

Saturday 12 December 2015

A trip to Mexico (very photo heavy!)

when I saw our room was number 404 I couldn't resist making this!


My blog has been pretty quiet over the last couple of weeks, because I was away on holiday. Earlier this year, I was delighted to  win a competition run by Kankun Sauces and sponsored by Aero Mexico  - a trip to the beautiful island of Cozumel off the coast of the Yucatan Peninsula in Mexico.  We decided to take it in late November/early December to give us a break from the miserable weather we tend to get in the UK at this time of year.

Our destination was the lovely boutique hotel Playa Azul. The journey was rather long, as we had to fly to Mexico City, make a connection there, fly on to Cancun (passing close to the smoking volcano Popacatapetl which really excited me, the first active volcano I have ever seen), travel by minibus to Playa del Carmen, take the jet ferry over  to Cozumel and finally a taxi to the hotel. We were exhausted when we arrived, but when we looked out of the window of our room and saw this.....


... suddenly the long journey was worth every minute!

The hotel was lovely, a small, friendly place with very welcoming staff. I even ended up folding some paper bows with the lady in the gift shop - you can't keep a crafter from joining in when she can! - and I was very impressed by the towel folding skills of the maid, who presented us with a different, hibiscus-adorned, creature every day.


I might have to get hold of a book on towel folding now!

Naturally the local food was of great interest to us. We took most of our meals in the hotel, as it was a few miles out of the main town of San Miguel. There was a small line of restaurants opposite the hotel, but one of them sold nothing but lobster and two sold little else apart from it - not much use to us as Mark can't eat any seafood - and the last in the row sold nothing but key lime pie - not ideal for a diabetic! However the hotel food was excellent. There was a small selection of "international" dishes and a much bigger selection of Mexican ones. Breakfasts included a huge tray of tropical fruits, including papaya, one of my favourite foods, at the perfect peak of ripeness.  The soups, guacamole, black beans and all the different tortilla based dishes were delicious and beautifully presented, as well as being remarkably cheap compared to what similar meals would have cost in a good hotel back home, although the staff probably thought they were eye-wateringly expensive. The portions of guacamole were enormous - we reckoned that a single portion contained around 4 avocados! Here is a typical poolside lunch of guacamole and quesadillas


On the day we were meant to have a trip to the eco park on the island, the weather was wet and windy so our guide Yibran asked us what we wanted to do - naturally we said we'd like to see where local people shop for food, so our outing became a trip to the central market, a supermarket, a garden centre and lunch at the beautiful Casa Mission, set in lovely gardens, and a tour of the Tequila Museum that it shares grounds with. It was a fascinating day out and we stocked up on lots of ingredients - look out for lots of Mexican dishes appearing here in the New Year!

But for now I'm going to stop waffling and leave you with a selection of photos of our wonderful holiday.

the Cozumel promenade had some beautiful sculptures and statues

Flame of the Forest trees lined the walking/running/cycle track outside the hotel

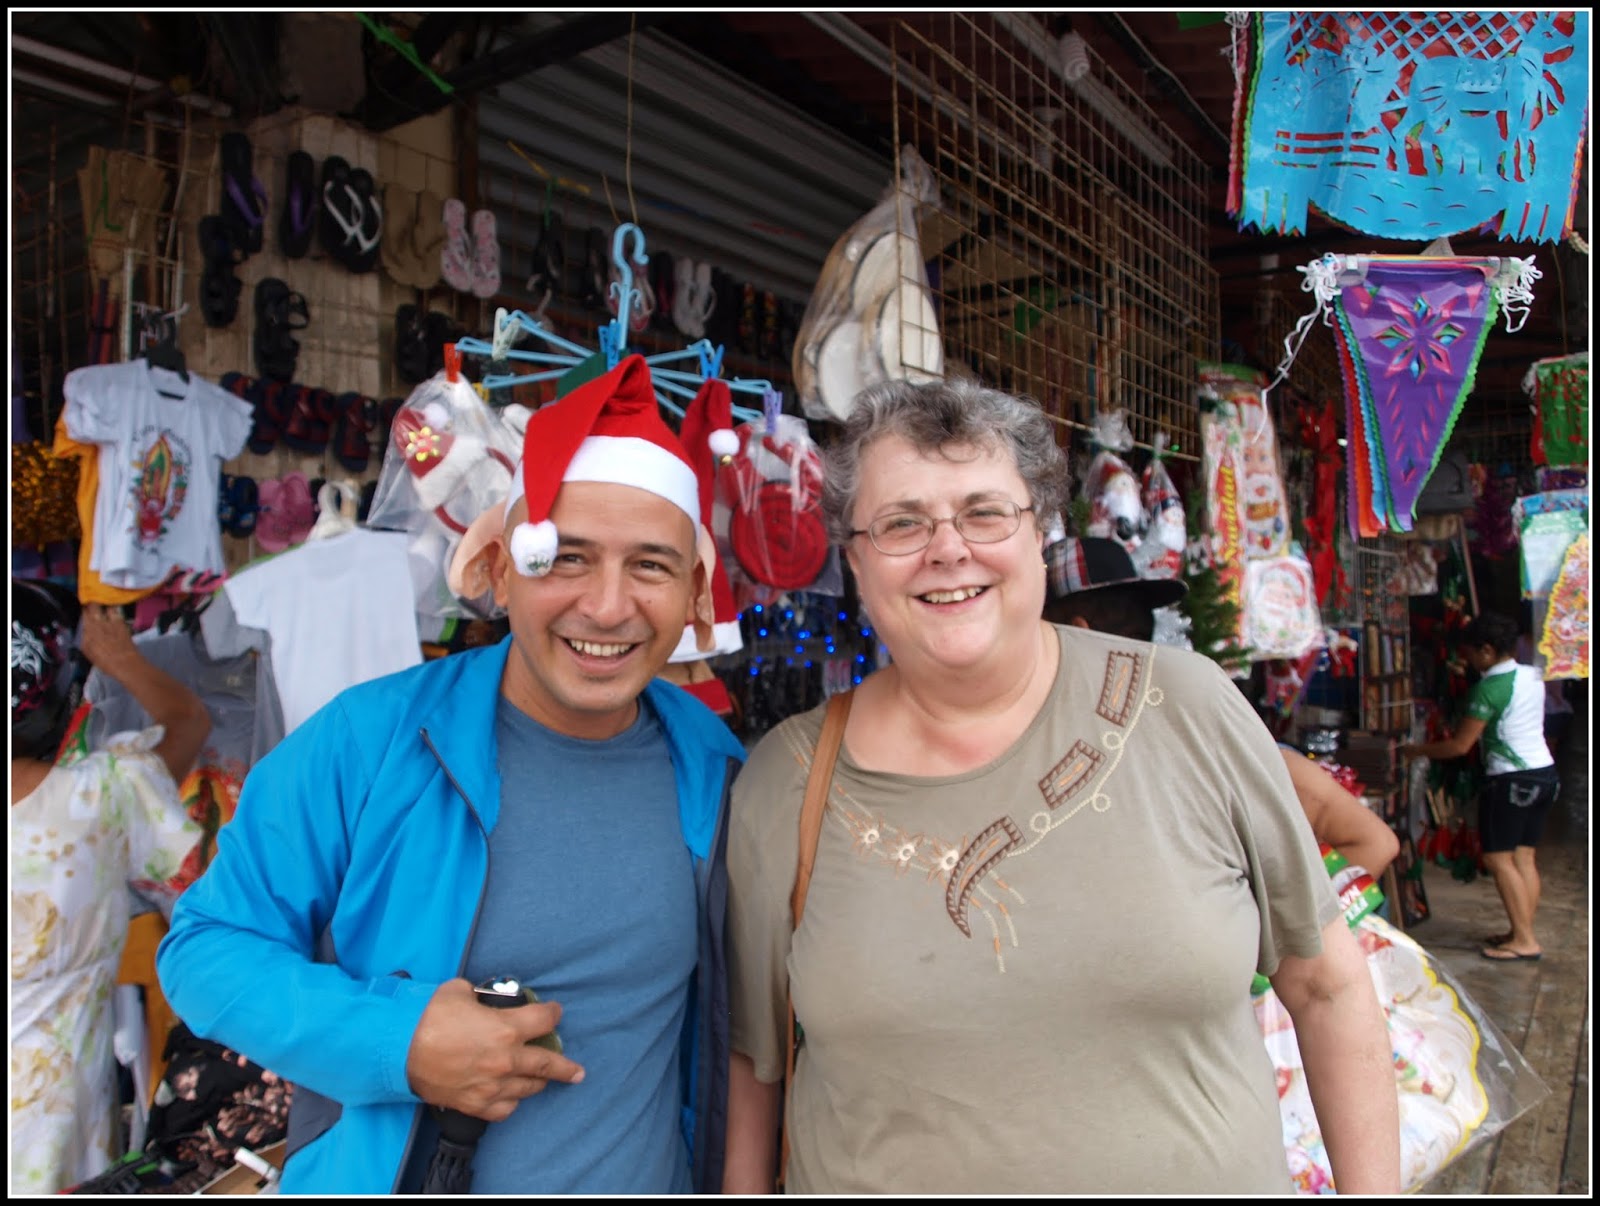
with our guide Yibran and a rather silly hat

looking back at the hotel from a nearby jetty

sadly I couldn't sample the wares here

a pelican treated us to a close-up fishing display

this tiny lady sold a wonderful selection of herbs and spices

there was beautiful pottery everywhere

Grinding agave for tequila

Making masa for fresh tortillas

Perfect papayas

Friday 11 December 2015

Another naughty Christmas card

I'm getting quite carried away with naughty cards - in fact I have another scheduled to appear soon, but sadly too late for the Naughty Christmas challenge at Sisterhood of Snarky Stampers. However this one is just in the nick of time for my second entry to the challenge. And while I was making it, I kept in mind the colour scheme of the optional photo inspiration at Christmas Card Challenges  - another last minute entry!

 The image is a digi from Bugaboo, JJ Christmas Candy Cane, coloured in with pencils and Stickles,   and the sentiment also from Bugaboo, Stella Christmas boy list.  The Zipper flowers are from Creative Expressions.


Thursday 10 December 2015

Naughty or nice?

Hello everyone, I'm back from a wonderful holiday in Mexico - I'll be posting about it and sharing some photos very soon. But for today, I want to share a card that I couldn't resist making! Just as we were packing to leave, I saw that the challenge at Sisterhood of Snarky Stampers this fortnight is "Naughty Christmas" and I couldn't wait to get started. I have several festive digis from Bugaboo designs that I hadn't even unzipped, and I knew they would all be perfect for the challenge, so while poor Mark was cramming my flip flops into the suitcase, I was busy printing them out ready to get colouring as soon as I got home.

Now we come to the reason those digis had remained unzipped. I am utterly rubbish at colouring them in. My first attempt was with a Stella image, great fun but I tried to colour it with Promarkers. The printing ink bled into the marker ink and poor Stella ended up with a pale green face, looking rather like Shrek with a hangover. Not really the naughty effect I'd hoped to create!

So I moved onto the second image I'd printed, JJ Christmas Cheers, and coloured her in with water based markers. The problem I had here was that the nearest I could find to a skin tone among my markers is this dark flesh, a colour I can only think of as TOWIE (if you are outside the UK, you may not understand the reference - TOWIE is a TV show called "The Only Way Is Essex" that features some remarkably orange fake tans). But actually, the overdone spray tan look turns out  to be ideal for this image! Even the streaks, from using water based markers, are realistic.

The sentiment is  stamped from my current favourite Dylusions Christmas sentiments sheet - I don't know how I made Christmas cards without it! The borders and corners are from an ancient set of peel offs and the sparkly hearts left over from a project I made a few weeks ago and forgot to photograph before sending it to a friend. The backing paper is from docrafts.


I'm sharing this with

Sisterhood of Snarky Stampers - Naughty Christmas
Crafting Musketeers - Use a Sentiment
Clear it out - Anything Goes
Crafty Gals Corner - Anything Goes  
Glitter and Sparkle - Anything Goes

Tuesday 8 December 2015

Traditional Christmas Colours at Cardz 4 Guyz

It's our final challenge of 2015 over at Cardz 4 Guyz  today and we'd like to see something in traditional Christmas colours this week.

To me, traditional Christmas colours are red, green and gold, with white to represent snow. So this tartan Hunkydory card fitted the bill perfectly. And I do love tartan on male cards! With all the decoration around the border of the card (it's an integral part of the card, not added by me!) I decided to keep the image simple, just a white embossed Christmas tree.


Do please drop in at Cardz 4 Guyz with your own creations and to see what the rest of the DT have made - and we'll be back with new challenges and inspiration on January 5th.

Saturday 5 December 2015

Flowers at Twofers

It's time for a new challenge at Twofers. Now, here in the UK it is the middle of winter, so it makes a lovely change to think about flowers, which is what we are asking you to use as the theme this week.

I decided to go for a Clean and Simple look this time,  using a medallion stamp that has been in my collection for many years. The brand name has worn off the backing sheet - all I can see is that it started with a letter K!  Instead of using it to make a dimensional, stacked card, as we used to when medallion stamps were all the rage, I decided to keep it pretty much flat, by stamping the layers onto primrose yellow and green papers and sticking them all right down on the card, to give the effect of paper piecing. To keep the CAS look, I only added a very faint touch of colour to the flower centres, using light strokes of pencil.


Why not pop over to Twofers and see what the others on the team have created? And while you're there, we'd love it if you shared your flower-themed creations with us. Don't forget you only need to make ONE item (although we are delighted to see more if you care to!) and there is a prize for our favourite. Your work MUST include some stamping but no digis.

Let it Snow

I'm absolutely thrilled to have been invited to be Guest Designer for the latest challenge at Inkspirational where the current word prompt is FLAKE

 
Hastily dismissing all thoughts of that chocolate bar in the yellow wrapper (does it still exist?) I opted for the more obvious Snowflake, most appropriate for this time of year (at least,  here in the UK).  The snowflake stamp is an old PSX one called Ornate Snowflake, stamped and embossed in white and then sponged with a mixture of individual inks from the lighter end of a Kaleidacolour Blue Breeze pad, fading away as I worked out from the snowflake. I added tiny specks of Stickles as extra flakes around it, and the sentiment is stamped with a recent magazine freebie.
 
As I'm away at the moment and can't be around to add the Guest Designer badge to my sidebar, I'm popping it here for now:

 
I am sharing this with
Craft Rocket Challenges - Anything Goes 
Fantast Stampers - CAS Christmas