Tuesday 28 August 2012

Candy at the Craft Barn!

I'm still on my spending ban! I haven't bought any new craft stash at all since early July now. Am I feeling the strain? No, perfectly honestly, I'm not! As I said in my original "Too Much Stuff" post, I had already ordered a Christmas kit from QVC to arrive this month, so I have had something new to play with, and on top of that I have had several prizes from craft magazines and lovely craft sites on Twitter,  so I've had a lot of new stuff to stroke, while rediscovering and using up all sorts of beautiful old bits and pieces I had forgotten all about. All the cards I have created for various challenges since that original post have been made from my stash mountain, not just the ones in the follow up posts.

All you stunning shops out there who are feeling the pinch because I'm not spending - don't panic! Just think how much I'm going to need to spend after my clear-out, in order to fill up all the space I've created!!! And one of the places I'll be shopping is The Craft Barn although if I win the super blog candy they are offering the shopping spree might be a little delayed.


They are giving away this gorgeous bundle of goodies - all you need to do is blog about the giveaway, including the photo, and then add your blog post to their linky. Pop over to their blog now and join in! You have until September 9th to take part.

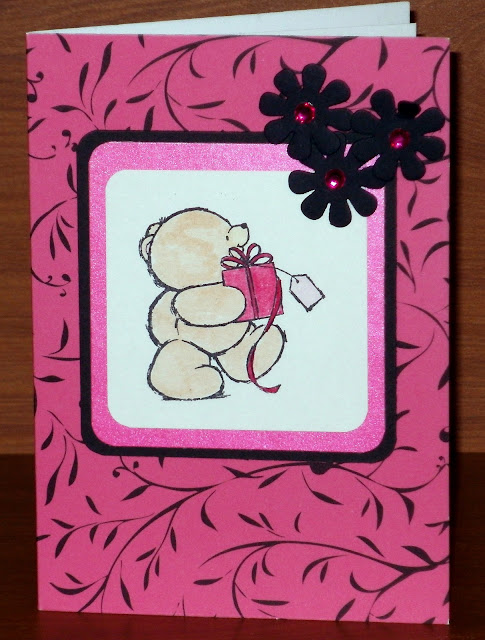
Finally, a couple more cards that I've made from the stash mountain and not yet shared


I'm linking this to 52 Card Pickup week 35

Sunday 26 August 2012

Getting in holiday mood

Yes, I know we've only just come back from Vienna, but in less than two weeks Mark and I will be off on holiday again, this time to Turkey.

Two years ago I won the Sunday Times Where Was I? competition, when the prize was a trip to Bordubet in Turkey. I'd already won so many holidays that year that Mark had run out of leave (!) so I went with a friend, but knew straight away that it was the prefect place for me and Mark to go, so booked a holiday there last year. And we enjoyed it so much that we booked again as soon as we came home, for the same week this year!

The food at Bordubet is excellent - healthy, fresh and delicious - and one of the lunchtime snacks we loved was a flat bread topped with a spicy lamb mixture called Lammakhun (please excuse my spelling!) so I was delighted to find  recipe for a version of it on page 125 of the October - yes, I know it's only August but I'm a subscriber so already have my copy - issue of Olive magazine, using a pita bread as the base.

The minced lamb is cooked until slightly crispy with onions, chilli, tomatoes, allspice, cinnamon and cumin and a tablespoon of  pomegranate molasses - the mystery ingredient I mentioned recently. I was delighted to find a use for it! The resulting mixture is spread over the pita bases, topped with sliced red onion, or in my case shallot as I'd run out of red onions, and lots of parsley, and seasoned with lemon juice. Then a few minutes in the oven to crisp up the base and they are ready to eat.


Verdict: not as thin and elegant as the real thing, but absolutely delicious!

We served it with an aubergine salad that Mark concocted, again based on a dish we ate in Turkey. I'll not describe it in detail as he will be blogging about it soon, but here is a sneak preview of the finished dish.


We also had one of Mark's delicious crisp little Lebanese cucumbers, fresh from the garden, and a quick fennel salad I made  - a thinly sliced head of fennel, a  sliced  shallot, a few green peppercorns and lots of snipped chives, with a lemon and olive oil dressing
.


Thanks to the copious quantities of parsley and chives, I am sharing this with the Herbs on Saturday link up at Lavender and Lovage.

Saturday 25 August 2012

Birthday cards from crafty friends

I'd like to share with you the beautiful birthday cards I received from my crafty friends:

from Sharon

from Nicky

from Debi-Lee

fron Chrissie

from Helen

from Gill

from Chrissie C

from Sue

from Heidi

from Carol

from Mandi


from Marina

from Margaret

from Paul


no, this isn't a card, I know - it's an envelope. But it was written by my three year old grandaughter, so I'm allowed a proud granny moment!


Friday 24 August 2012

A very special birthday card

August 13th was my birthday. We went to Vienna for a few days to celebrate, so I've only just been able to photograph and start posting about all the lovely cards sent to me by my crafting friends. But I'm going to start by devoting a whole post about one very special card sent to me by Steph Axtell.

Steph is not only a crafter, she is also a comper, and we got to know each other through comping, where we first "met" in the newsgroup uk.rec.competitions - neither of us uses it any more but we are both members of the London Competitors Club. We'd known each other for a long time before we realised we were both crafters too. In fact comping and craft seem to go hand in hand. I think a lot of compers start to make their own postcards out of old greetings card and cereal packets, and then get a taste for creativity!

I'm always impressed with the cards Steph sends and often use them as inspiration for cards of my own, but this year she really excelled herself, making a card that is a beautiful gift too, and perfect for a comper. Her "Card" is a book, and on each page is a cellophane card bag containing a hand made postcard. The idea is for me to use these postcards  for my competition entries - and what promoter could resist picking one of these beauties out from among a pile of plain white or boring advertising postcards?


I've not shown you the front of the book as that was Steph's personal birthday message to me and not for sharing!

Thursday 23 August 2012

Fresh tomato sauce

Despite the annual battle against the blight, which seems to have been mase worse by this year's weather, Mark has managed to produce a lovely crop of tomatoes, so I decided to make some of them into sauce to freeze for use later in the year.

This is  a very basic sauce - you can add celery, carrots or peppers to it during the initial cooking,  vary the herbs or zing it up with some chilli, but I find it is more versatile made quite plain. That way it can be used in a wide range of different dishes, from curries to pasta sauces, as a soup base or even a pizza topping, simply by adding different ingredients to it when you use it.

Start with 2 kg tomatoes and two large onions. You will also need 4 cloves of garlic, some Herbes de Provence and a squeeze or two of tomato purée.


Slice the onions and place in a large pan with 500ml cold water and about half a teaspoonful of dried Herbes de Provence. Roughly crush the garlic (I just give it a bash with the flat of a heavy knife) and add it to the pan.   Halve the tomatoes across their "equator" and squeeze each half over a bowl so the seeds drop out. Leaving them in will make your sauce bitter and watery. However you don't need to skin them as the skins will be sieved out later. Slice the halves and add them to the pan. Don't add any seasoning yet.


Now cook the whole lot very slowly for at least a couple of hours until everything is disintegrating.  Once it is cooked, push it through a fine nylon sieve to remove the skins and any remaining lumps of onion. You can get even more of the lovely pulpy sauce out of the mixture if you use a Mouli-legumes with the finest disc in it.


Once it  is all sieved, return to the rinsed out pan and, if your tomatoes are on the pale side, add a little tomato purée to improve the colour. I found this year's tomatoes didn't need any. Now boil hard until your sauce is very reduced and concentrated. If your freezer is as full as mine at this time of year, you'll want it to be as thick as possible so it takes up the smallest amount of space - you can always dilute it when you use it! This is why I prefer not to season it - I like to do that when I am using it as i know then how much I am diluting it.


Finally pack in freezer boxes and don't forget to label it (speaking from experience - it looks very like dhal when frozen).

I like to have some home made pesto that has been frozen in ice  cube trays in the freezer. A tub of tomato sauce warmed up with a cube of pesto in it makes a delicious almost-instant sauce for pasta. And one of  these tubs has been earmarked for use in a stuffed  marrow.
 
I'm joining in the Simple and in Season link-up at Fabulicious Food

Wednesday 22 August 2012

The first stamp I ever bought.....

.... a very long time ago (about 20 years, I think) was this horse chestnut leaf. It's been used so many times the writing has almost worn off the wooden block, but I can just about make out that it was from Personal impressions. I must have used it literally thousands of times, in hundreds of different ways,  and I come back to it again and again. Nature never goes out of fashion!

I've used it this week to combine several challenges. Over at Less is More,  the challenge is "tearing" while at CASology  the cue card is "Green"  and this month's challenge at The Cupboard Trilogy is embossing.

I found it very difficult to get my head around the idea of a CAS design that involved tearing - somehow that always goes with less "tidy" cards in my mind. But I've been inspired by the cards I've seen on some of the other blogs taking part in Less is More, and since this leaf really LOVES being embossed in green, combining the challenges gave me the inspiration I needed.

I heat embossed the leaf with Verdigris embossing powder. It's quite old and doesn't adhere very well any more, giving a more delicate effect that doesn't obscure the fine detailing on the stamp (typical crafter, I won't waste a thing - just find a new use for it). I tore around the images then mounted them on Core-dinations paper which had been dry embossed in the Cuttlebug with a wood effect folder then sanded to reveal the core, which is actually green although it doesn't really look it in the photo.


I am submitting this to

Less is More week 81 - theme - Tearing
CASology week 7 - Green
The Cupboard Trilogy Challenge #2 - Embossing
52 Card Pickup - week 34 

Old Back Porch

Monday 20 August 2012

The Naschmarkt, Vienna

Have you missed me? We've been away for an absolutely wonderful short break in Vienna. The weather was glorious - sunny and warm, but not too hot for sightseeing, and armed with our Vienna cards, which give you 72 hours unlimited use of public transport, we saw lots, did lots and ate lots. One day we spent at the Belvedere, taking in the gardens and the art exhibitions - especially the Klimt, as his work always appeals to the crafter in me - and another day we took a bus out into the hills  of the Vienna Woods.

But the best experience for any food lover visiting Vienna is the Naschmarkt, a double line of permanent market stalls specialising in foods of all kinds from the relatively mundane to the exotic, with a third line of bars, cafés and restaurants along one site, which stretches for around a mile along one of the city streets. I'll stop wittering now and let the photos speak for themselves......


Monday 13 August 2012

Craft room challenge - Fashion

I'm getting a bit braveer about entering new challenges, so this week I've decided to take part in the Craft Room Challenge  where the current theme is Fashion.

The stamp I used is one I bought at the Make It Show in Farnborough several years ago - I think it is by Dimension 4th. That's the trouble with clear stamps, isn't it? Once you've thrown away the packaging you lose all record of which stamp they are and where they came from.

All the rest of the materials are from my huge backlog of unused stash - the paper must be getting on for 15 years old, which almost qualifies it to be vintage in its own right!


I gave the image a vintage look with distress inks and stamped the "stitiching" with a clear stamp that is actually a straight line, but is flexible enough to be curved  here and there to give a more random "tacking" effect. Now  I need to find somewhere I can buy a pair of shoes for 1/- (5p)

Sunday 12 August 2012

Fur and Feathers - Less is More #80

This week is a One Layer challenge at Less is More, and the theme is "Fur and Feather"

Now being a cat lover, I have lots of "furry" stamps, and over the years I've also collected lots of  bird  and feather designs, so I thought I'd make two cards, one fur and one feather.

I started off with feather. I rejected all my bird  stamps in favour of this beautiful feather stamp which has been in my collection since about the year 3,500 BC and doesn't get used anywhere near enough. I know how simple and elegant it looks embossed with gold powder (hence my question on the challenge post), so I simply stamped and embossed it on a white card, then added the greeting (remembering to use my stamp positioner this time - I've learned that it is ESSENTIAL for me to use one when making a one layer card, especially for words) then finished it off by ruling lines with a gold gel pen.


Now on to fur. My plan was to stamp an image of a cat stealing from a milk bottle in the centre of the card, then simply use a Versamark pen to colour in the milk bottle and triple emboss it with clear ultra thick powder to look like glass.

However once I'd done that, it looked TOO simple. Boring. So I thought I'd brighten it up by adding a little colour to the cat with pencil, then using the waste from a die cut circle as a mask to add a subtle "halo" of brown around it.

Well, I haven't used chalk for ages and my chalks have gone all crumbly. And I got chalk EVERYWHERE. It's even halfway up the wall, which was three feet from where  I was sitting. The card was covered in all colours of chalk, and  when I tried to brush them away they just stuck and got stubbornly more and more ingrained. Crafters, don't worry about using chalk fixative - the trick to getting chalk to stay put is to put it where you don't want it. That way it will stay there forever!

The image was fine, and the chalk circle around it worked, but there was no way it would make a one layer card unless I was making it for somebody I hated. So the feather card above is my challenge entry and  here is another instalment  in my occasional collection of "How I used the one that went wrong". It's not CAS, and it doesn't have one layer but I think it's pretty cute.


I die cut a second circle around the image to leave a white border. There was one nasty smudge I couldn't cut away - more about that later. Then I stamped paw prints all over brown card - after all, a naughty kitten like that would leave paw prints wouldn't he? I  used a greeting to hide the smudge on  the image. It says "May all your wishes come true" because I can see that kitten is really wishing his tongue was a little bit longer.  And because I wish I wasn't so messy, but since I am I have to learn ways to make the most of it, as I've done here.