Wednesday, 15 June 2016

No image or photo

OK, if you've looked at the thumbnail you may be puzzled as there IS a photo - unless, of course, you already knew that the latest challenge at CD Sundays is No Image or Photo. On the card, not in the blog post!

For my card I have used a selection of papers printed off from the Funky Hand CD "Funky Daze" - this is among my oldest craft CDs and still a great favourite, yet each time I use it I fond something new. I'm pretty sure I have never used any of the papers in this particular colour group before.

In place of an image, I've used an acetate sentiment from a very old Hot Off The Press kit, which I've stuck to white card and die cut. A couple of die cuts to pick up the pink of the stripes and the swirls on the teal paper finish the card off.


London Fog

This month's challenge at One Layer Simplicity is STENCIL. Now I don't have many stencils, so I decided to make one using a die from the X-cut Build-a-scene London set.

First of all I stamped and embossed the postbox and greeting, then masked them and also masked off an area in the middle of the card, taped down the die cut negative and sponged grey ink into it. The finished effect is of a traditional pillarbox with a foggy London skyline in the background.


I know this card is going to go down well with my competition loving friends - especially those in the LONDON Competitors Club, as we all love postboxes - after all, most of our exciting prizes come through the post!

Splish, splash, splosh

It's one layer week over at Less is More and the challenge is one that really strikes fear into my heart - SPLATTERS. I'm really not good at splashy, splattery stuff. I now have rejected practice pieces all over my craft table, and as friends who saw my Facebook status last night will know, orange fingers. In the end I decided to cheat and use stamped splatters - the dainty little splatters are an old Anita's stamp, and the splodge is from a Rubber Dance sheet, the same sheet as the sentiment - which even has numbers splattered all around!

A quick Christmas card

This card was very quick and easy to make, using a topper from an old kit (Kanban?) with a die cut layer, scraps of grey and black card and some embellishments from my stash.


Simple but, I think, effective. I am sharing it with

Crafty Hazelnut's Christmas Challenge - Silver
52 Christmas Card Throwdown - Black, white, silver and grey


Tuesday, 14 June 2016

Music at Cardz 4 Guyz

This week's new challenge is just starting at Cardz 4 Guyz, and this week the theme is MUSIC.


The background card I have used is the very last sheet* of a gorgeous pack of card I bought many years ago, at the Eden Project in Cornwall of all places! The wonderful swirly effect is made with coffee grounds embedded in the fabric of the card. The sheet music is a Kanban stamp and the collage and sentiment are from a sheet of clear stamps I bought from Create and Craft, sorry, can't remember the name or manufacturer. I coloured it with a mixture of Promarkers, pencils, distress ink and a gold metallic gel pen.

It all looked a bit too brown, and the stamped pieces threatened to merge into the background, so I added music and lattice die cuts in black - the lattice picks up on the diamond patterned area of the collage.

*last minute update - Happy Dance! I was looking for some card for another project and I found another sheet of this gorgeous card, so it's not all finished yet after all!

I would like to share this with:

C.R.A.F.T - inspired by a film (bit of a cheat, really, as the film Beethoven is really about a dog - but the name's the same!)
Addicted to Stamps and More - Make your mark
Sweet Stampin - 3 or more layers
Craft Rocket - For a man/boy
Alphabet Challenge - H for Hand Coloured Image

RECIPE - Lemon and Thyme Scones with Lavender Butter

You can buy lavender jelly from farm shops and garden centres - or substitute a herb jelly of your choice!


For the scones (makes 6):

200g self raising flour
50g butter
½ teaspoon salt
1 lemon
1 teaspoon chopped fresh thyme
water to mix

for the lavender butter:

50g butter, softened
3 teaspoons lavender jelly

Pre-heat the oven to 200 C, 400 F, gas mark 6. Line a baking sheet with non-stick paper.

Place the flour in a large bowl, stir in the salt and add the butter, cut into small pieces. Rub the butter into the flour with your fingertips until the mixture is like fine breadcrumbs. Stir in the finely grated zest of the lemon and the chopped thyme.

Stir in the lemon juice then gradually add water until the mixture forms a soft dough - the amount of water you need will depend on how juicy your lemon is.

Pat the dough out on a floured surface to about 1.5 cm thick and use a 6cm cutter to cut out the scones - the mixture should make around 6 scones.

Place them well apart on the prepared baking sheet and cook for 12-15 minutes in the pre-heated oven until they are well risen and a light biscuit colour.

They will not brown as much as a traditional scone because they don't contain any sugar and have not been glazed with milk or egg. Leave to cool on a wire rack while making the lavender butter.

Beat the softened butter until very soft and creamy, then blend in the lavender jelly a little at a time, beating well between each addition.

Split the scones and serve spread with the lavender butter.

The scones and butter can be eaten on their own as a snack, or served with cold meats, cheeses or fresh, light summer soups.

I am sharing this with Cooking with Herbs for tea Time Treats at Lavender and Lovage  and The Hedgecombers 

Tea Time Treats Lavender and Lovage 

RECIPE - Chipotle Burgers

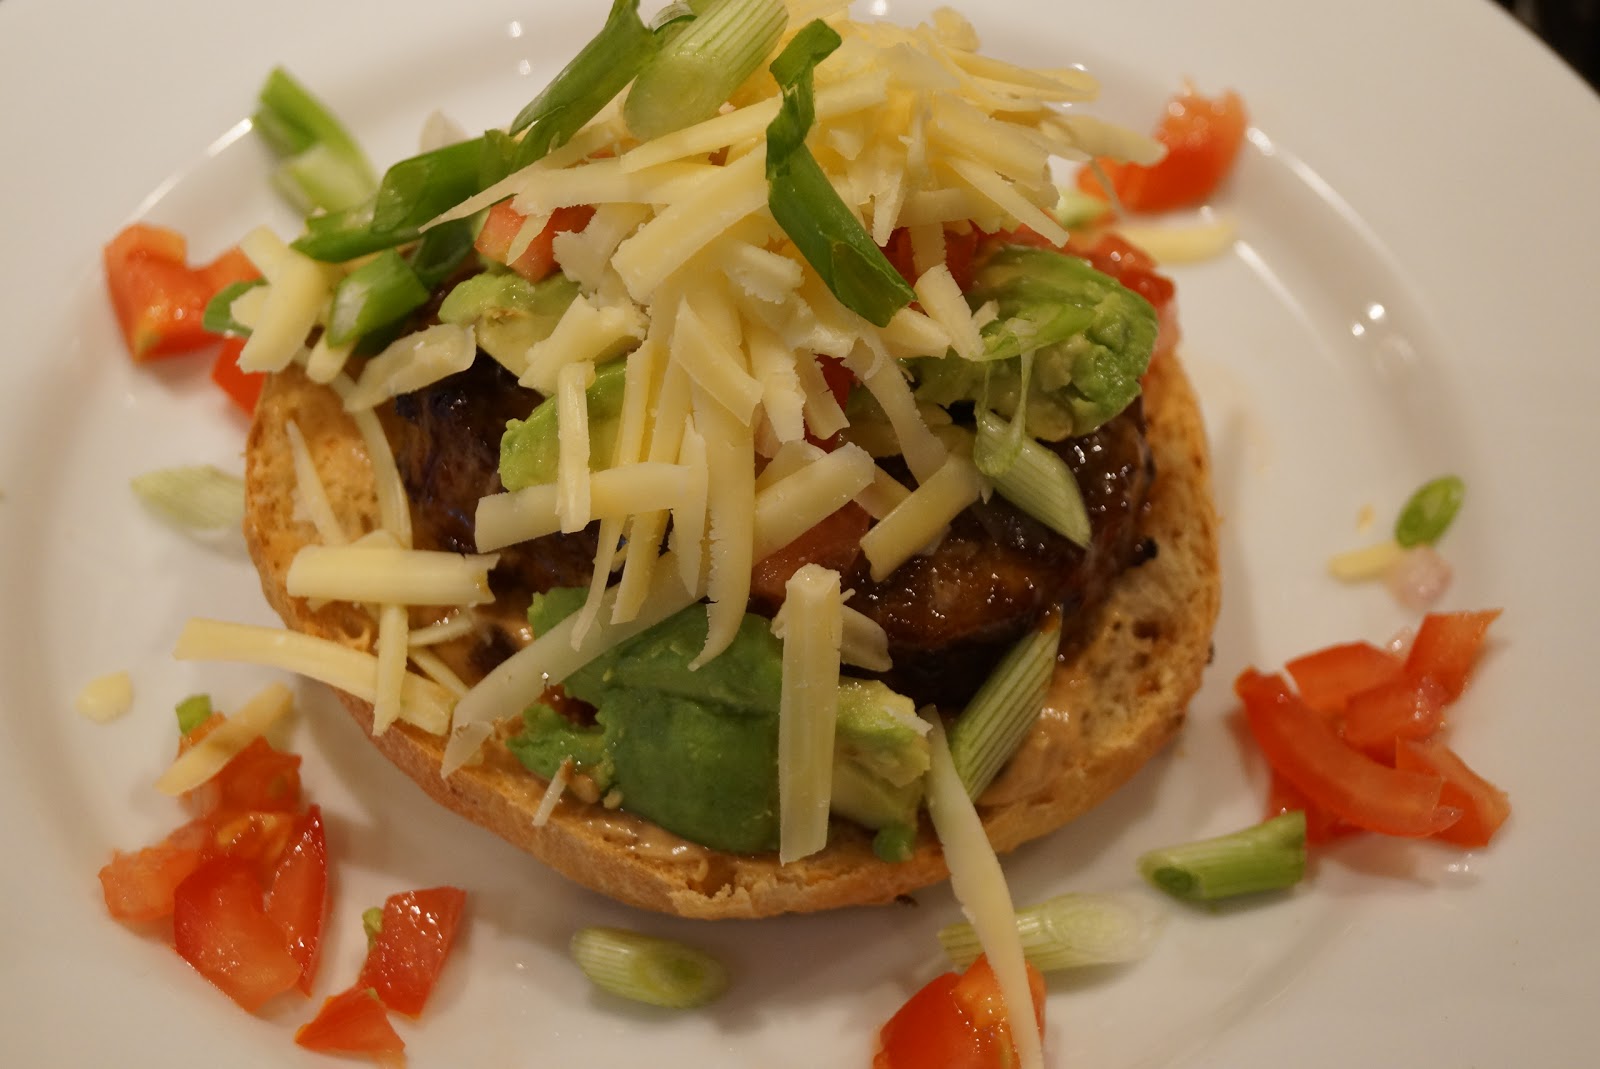
Actually, these burgers needn't be Chipotle ones - this is a really neat way of using up that half bottle of  any kind of BBQ sauce that's sitting in the fridge because the weather turned wet just after you started it (that's the British summer for you!) - what really matters is that you make your mayo mixture with the same sauce you grill the burgers with, so you get the flavour running through every bite! For the sake of the photo I've gone topless (ooh madam!) so you can see how beautiful it looks all stacked up before you squish the top of the bun onto it and take that first glorious bite.....


Ingredients (serves 2)

2 burger buns (being flashy, I used home made onion bread rolls)
2 burgers (also being flashy, I used Wild Boar and Apple burgers which I found on a freezer dive)
4 tablespoons chipotle flavoured barbecue sauce
3 tablespoons mayonnaise
1 torpedo shallot, finely chopped
1 lime, juice only
2 medium tomatoes, finely chopped
a pinch of salt
3 spring onions, finely sliced
1 small avocado
30g Cheddar cheese, coarsely grated

Brush the burgers with 2 tablespoons of the barbecue sauce. If you have time, leave them for an hour or so to absorb the flavour of the sauce. Heat the grill.

Make the Chipotle mayo by simply mixing 1 tablespoonful of the Chipotle barbecue sauce with the mayonnaise (bottled mayonnaise is fine for this recipe). There will be more mayo than you need - use the rest as a dip for chips or crudités.


Make the salsa by mixing together the shallot, tomatoes, salt and lime juice. If you like fresh coriander, you can add some - I can't use it as Mark is allergic to it.


Grill the burgers until done to your preference, brushing the remaining barbecue sauce over when they are half cooked. Slice the avocado and halve the rolls while they cook, and spread the rolls with some of the Chipotle mayo.

Serve a burger on each roll topped with sliced avocado, salsa, grated cheese and spring onions.


This is my entry to #KitchenClearout at Madhouse Family Reviews - the perfect place to share ideas for all those odds and ends left in the fridge and cupboards